This article shares the personal experience of the author, psheva, who deserves a big thank you.
Introduction
I’m 22 years old, and my husband and I are renovating our attic apartment. Not an apartment with an attic, but an actual attic apartment 🤓
We have slanted walls (which are also our ceilings) in every room.
Why did we buy this apartment?
- It’s a newly built apartment in a good neighborhood (near the river, far from factories, close to schools, a kindergarten, supermarkets, a market, and a bus stop).
- It’s in a great residential complex with an HOA. There are only 8 buildings so far, including 3 townhouses. There’s a nice playground and sports field. A small park will be built soon. The territory is gated, and the HOA employs 6 security guards, 4 cleaners, 6 janitors, a landscape designer, handymen, an accountant, a manager, a chairman, and a lawyer).
And all of this for a reasonable monthly fee (many HOAs offer 30% less and have none of these amenities). - The price. The square meter price was significantly lower (considering the building was commissioned in 2009) than in new buildings (which require a 2-year wait) – 25% lower, and 61% lower than similar apartments😱.
- A nice bonus in the form of individual apartment heating.
What did we get when we bought the apartment?
- Well, the apartment, of course. The area at the time of purchase (this will be important later) was 75m2.
- An electric boiler (by the way, there’s no gas in the apartment because it’s on the top floor) + 6 radiators.
- 2 water meters (but only cold water is connected).
- An electricity meter with a passport.
- A cheap Chinese door that flexed when you pressed on it.
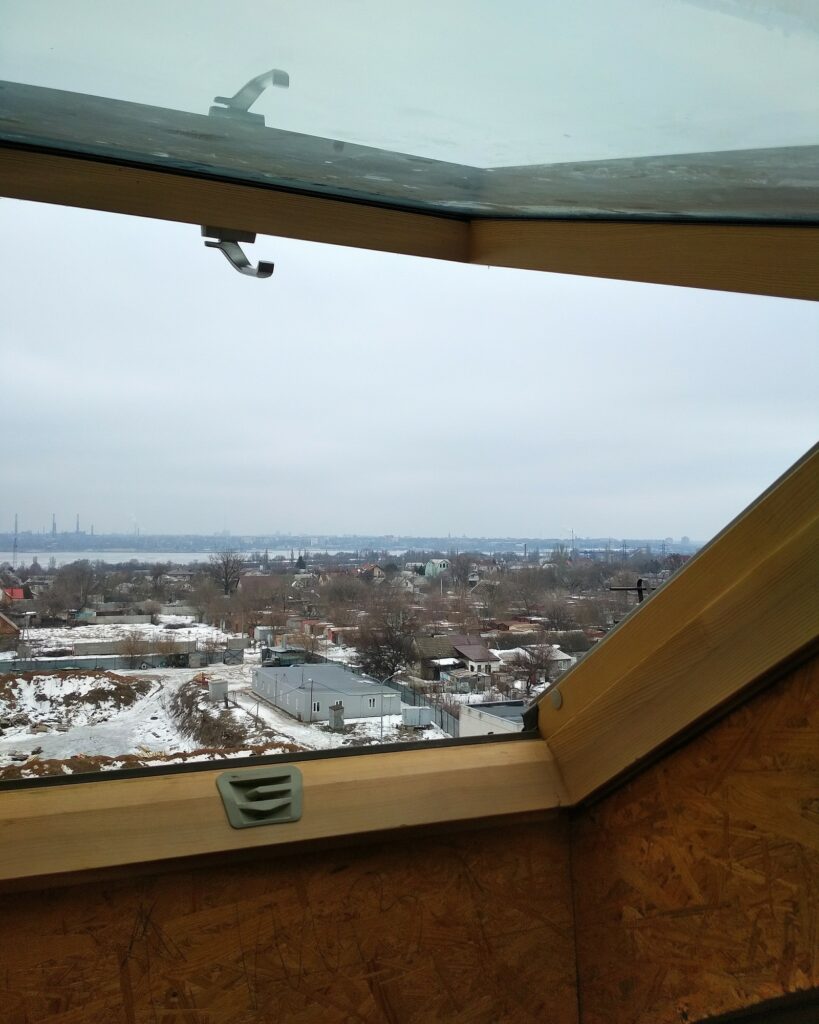
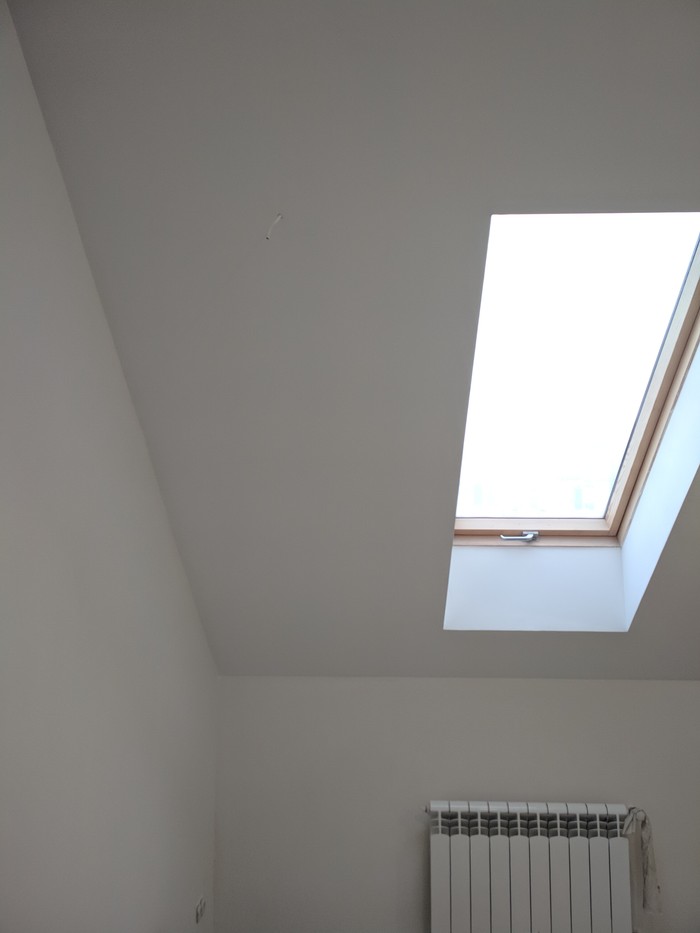
- 5 cool Fakro 160*78 cm center-pivot roof windows (for reference, one costs about $700).
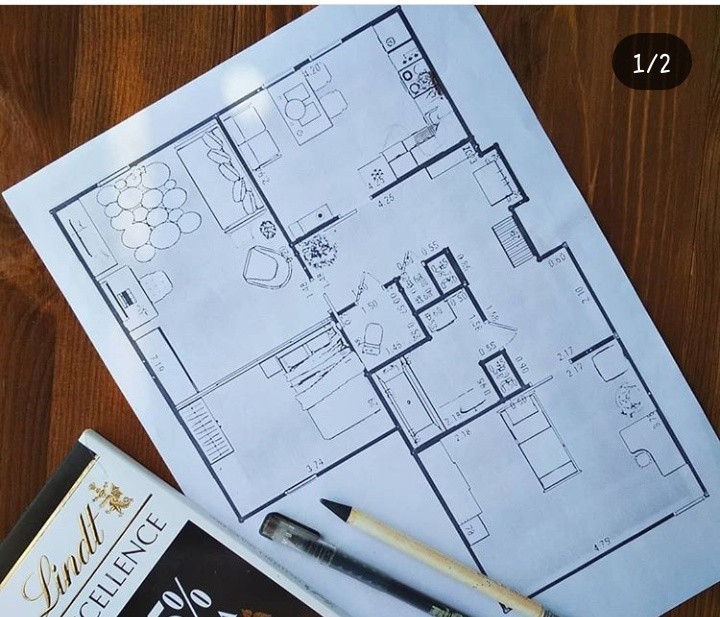
Layout
Today I’ll show you our layout.

- Total area: 75.1 sq. m.
- Living area: 42.9 sq. m.
- Kitchen: 14.2 sq. m.
- Bathroom: 5.7 sq. m.

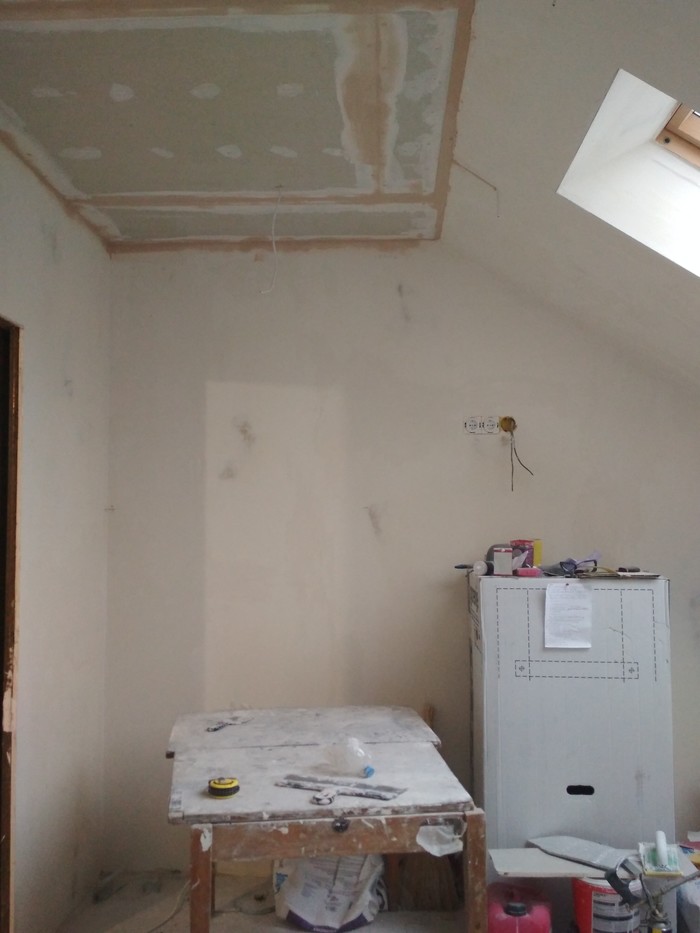
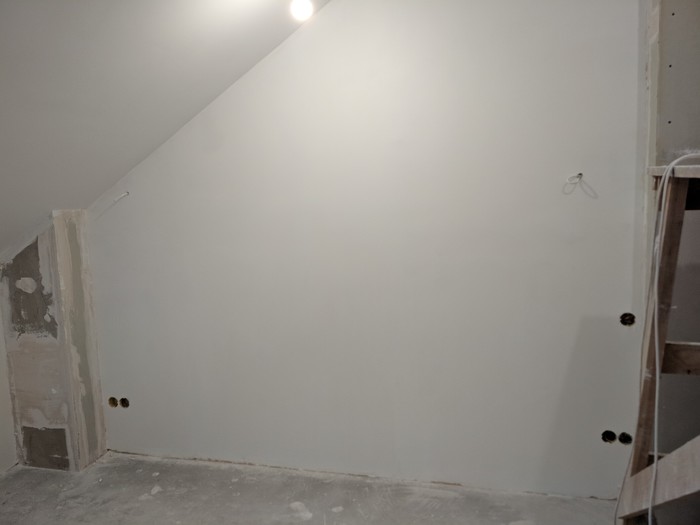
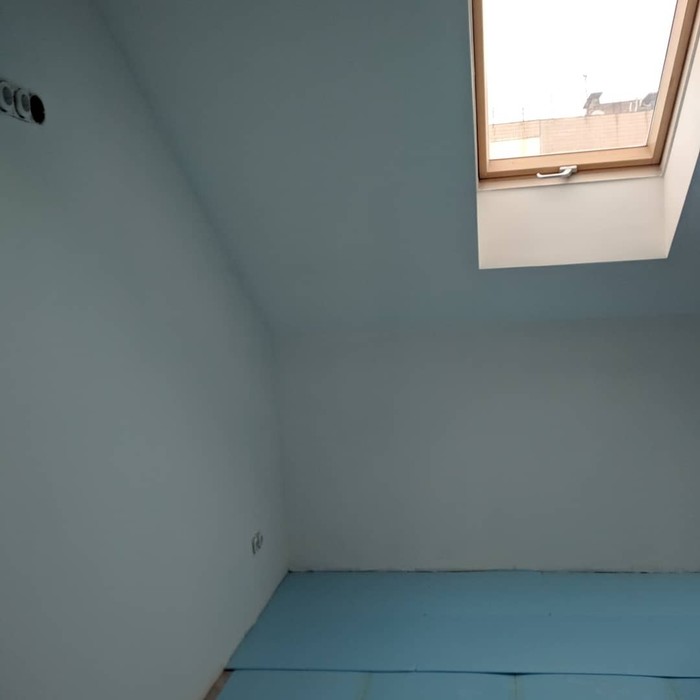
The ceiling height is not actually 2.6 meters (that’s just for documentation purposes). In fact, in the middle of the apartment (where the entrance is), the ceiling height is almost 5 meters. In the 25 sq. m. room, the ceiling height is 3.2 meters (that’s where the roof slopes down, which we decided to keep for ambiance).
The ceiling height in the kitchen and living room starts from 1.4 meters. And here’s where we got lucky. The thing is, according to regulations, the height where the slope starts should be 1.1 meters. But ours is as high as 1.4 meters. And that’s a big difference!
Firstly, I can practically stand right next to the wall. Secondly, behind the wall, there’s an empty space (a niche that goes all the way to where the roof meets the floor – 1.2 meters deep). We decided to move the wall to gain extra square footage, which would give us an additional 2 square meters.
In the nursery, the slope starts at 1.2 meters (*there’s a square on the plan – a supporting beam). In the living room, on the nursery’s side – 0.8 meters. That’s low, of course. Objectively – very low.
The decision was made to reconfigure the layout (not a major overhaul, there’s a load-bearing wall between the living room and the rest of the apartment).
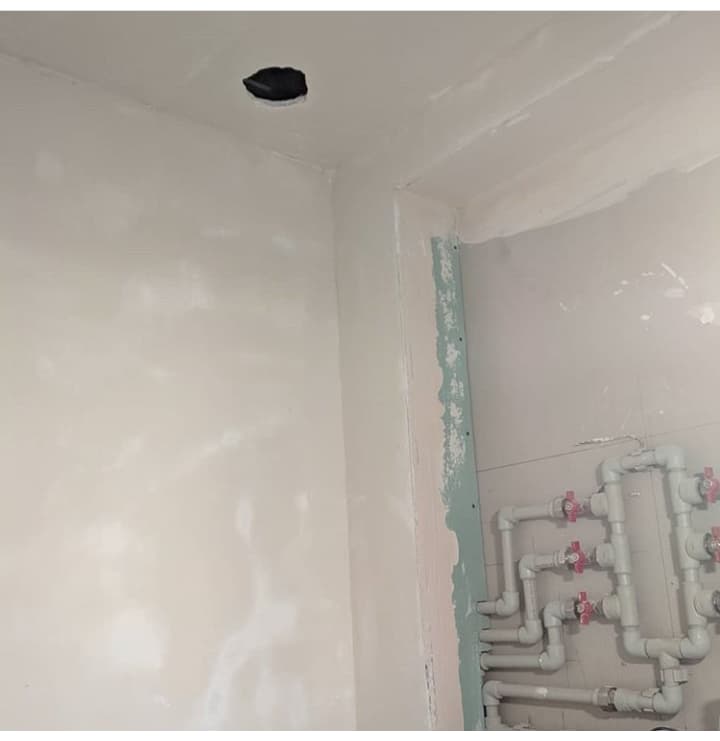
- There will be an actual attic above the hallway and the bathroom. That’s an additional 19 sq. m. (18 sq. m. + moving the wall deeper into the kitchen to make room for the hallway).
- We’ll separate the bathroom and enlarge it using the niche in the hallway (on the plan, there’s a storage room next to the toilet, but eventually, this niche will become part of the toilet and will house the water heater).
- We’ll divide the living room. The small bedroom is a conscious decision. Its area is 8.5 sq. m. It has a window. It will fit a bed and a built-in wardrobe. We only sleep in the bedroom, the rest of the time we spend in the kitchen and living room.
This plan is approximate. It doesn’t take into account the increased area due to the slopes.
So, here’s the final result:
- Total area: 77 sq. m. + attic
- Living area: 44.9 sq. m. (living room – 18.8; bedroom – 8.5; nursery – 17.6)
- Kitchen: 14.5 sq. m.
- Bathroom: 4.5 sq. m.
- Toilet: 2.3 sq. m.
- Hallway: 10.8 sq. m.
We’ll install the boiler and a wardrobe in the hallway niche. In the nursery, we’ll add another window symmetrically.
The Attic
So, we decided on the attic.
Why did we decide to do it?
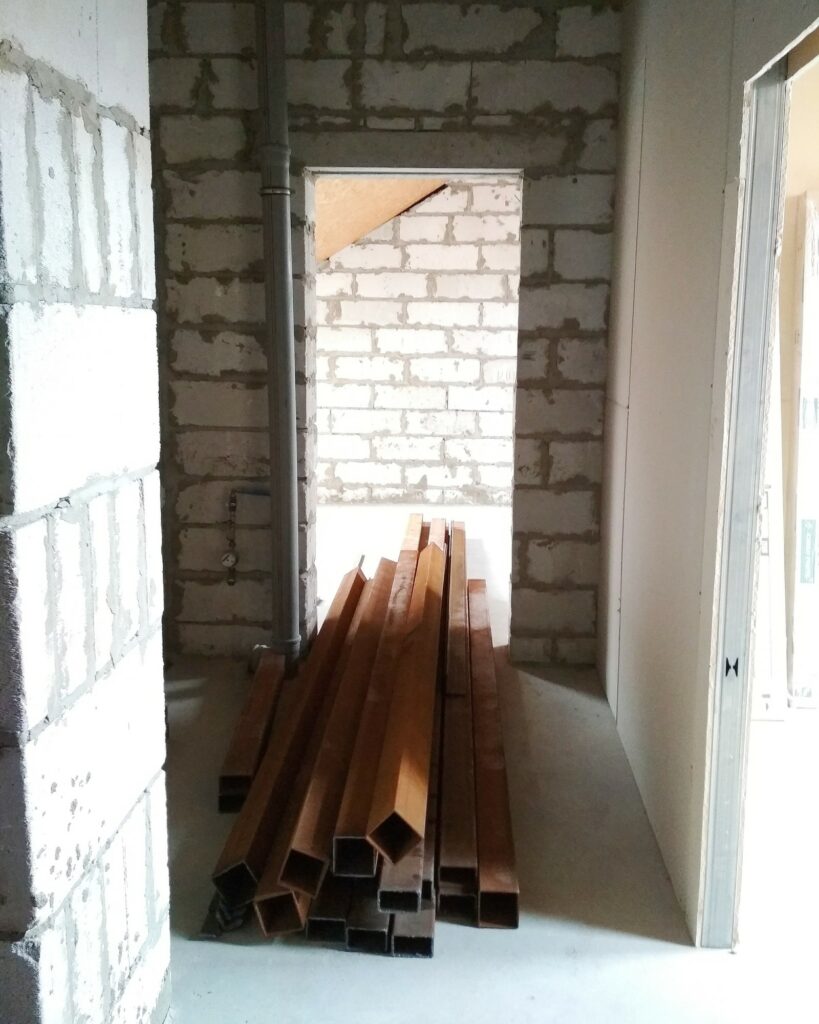
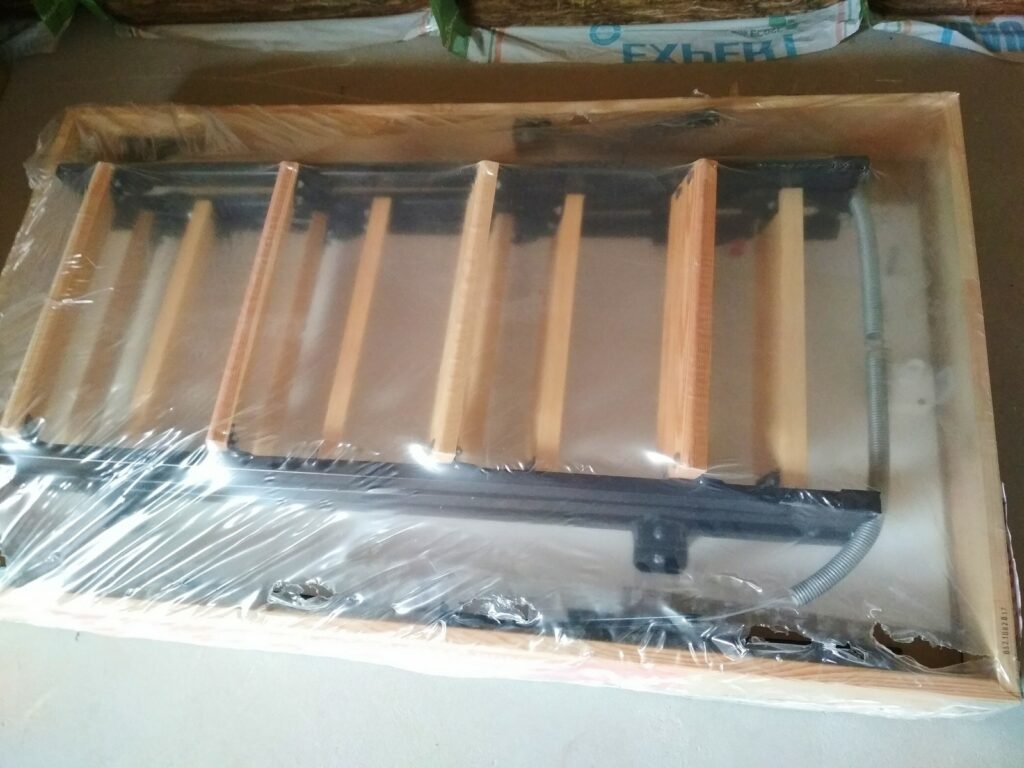
The attic’s frame is metal. A lot of metal. And it’s expensive + labor + carrying it up to the 6th floor without an elevator + flooring and walls. The attic ladder is a trifle compared to these expenses.
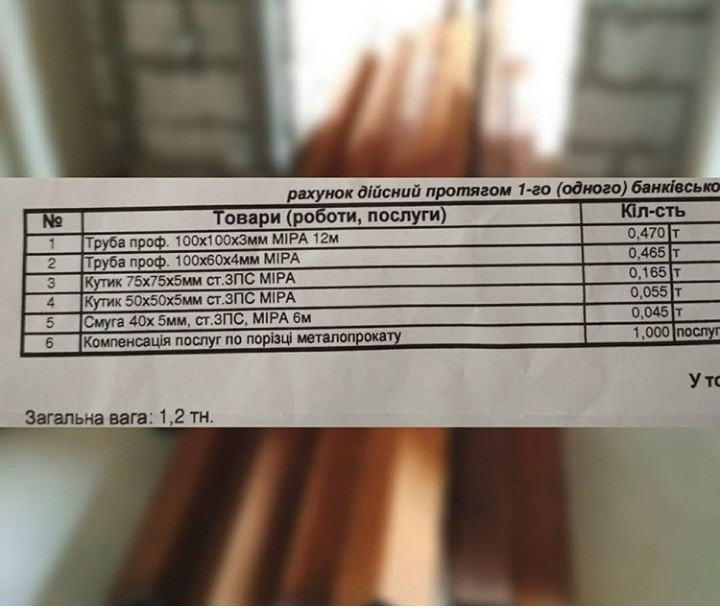
This is the receipt for the metal. The hauling cost a fortune (we try to save not on quality, but on other little things). Thanks to my husband and his friends (they help us a lot physically in general). Of course, we’ll treat them later 😉
Sending a “shoutout” to Zoom 🤗
There aren’t many photos of the work itself, but there are some showing the intermediate results.
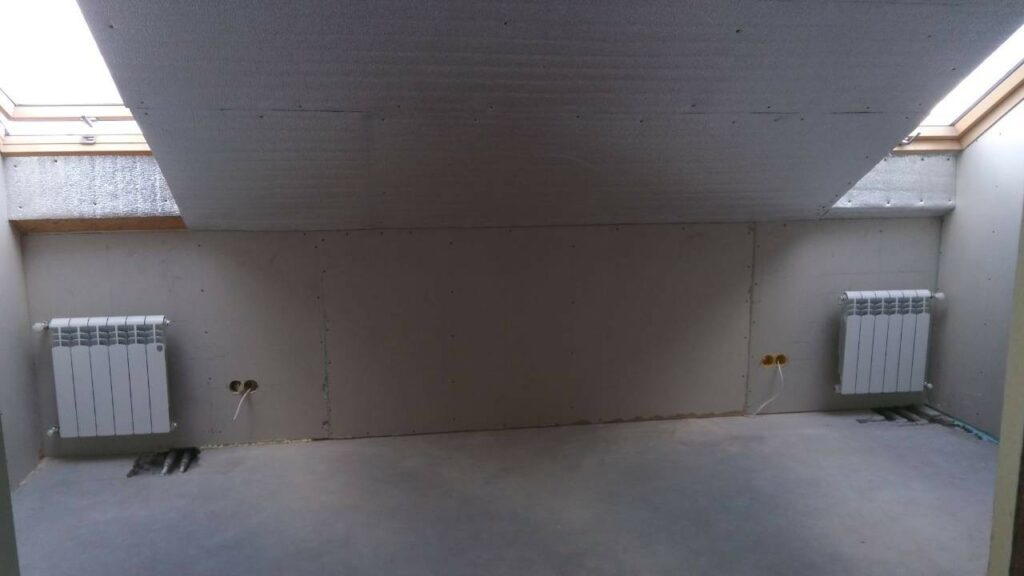
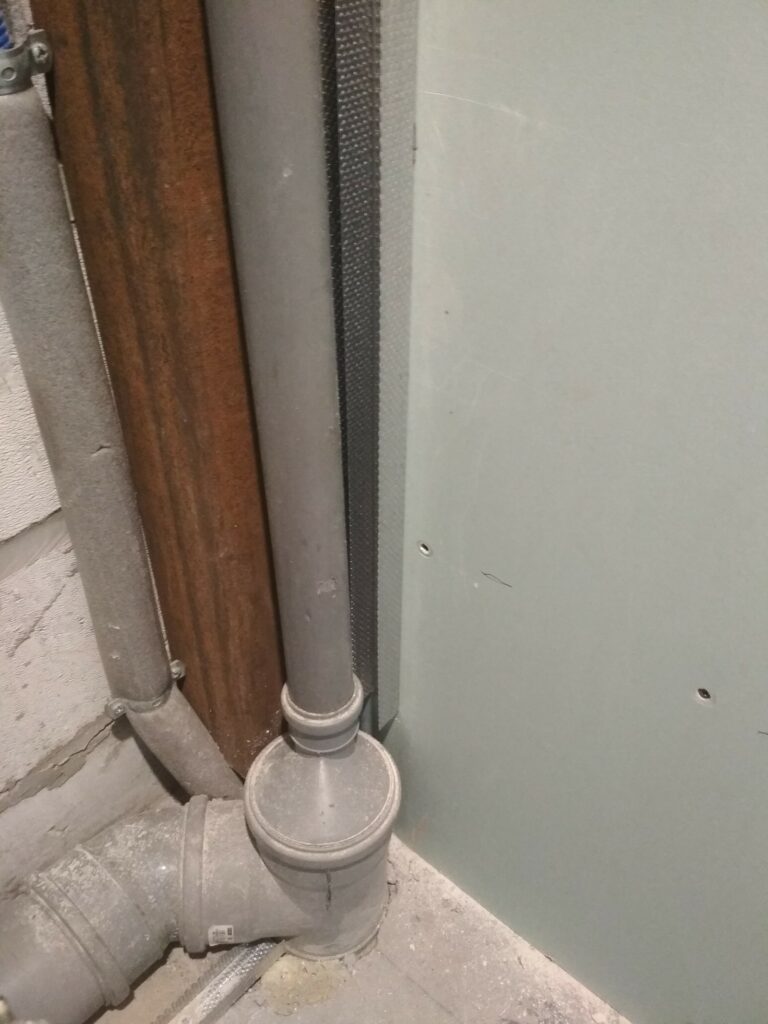
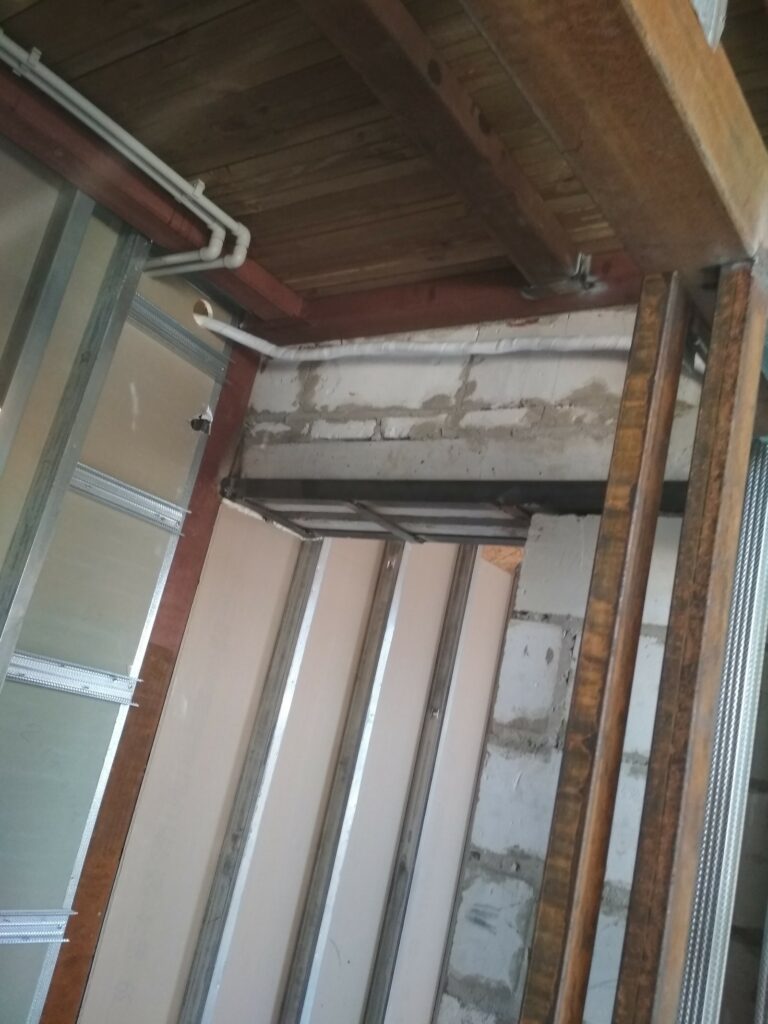
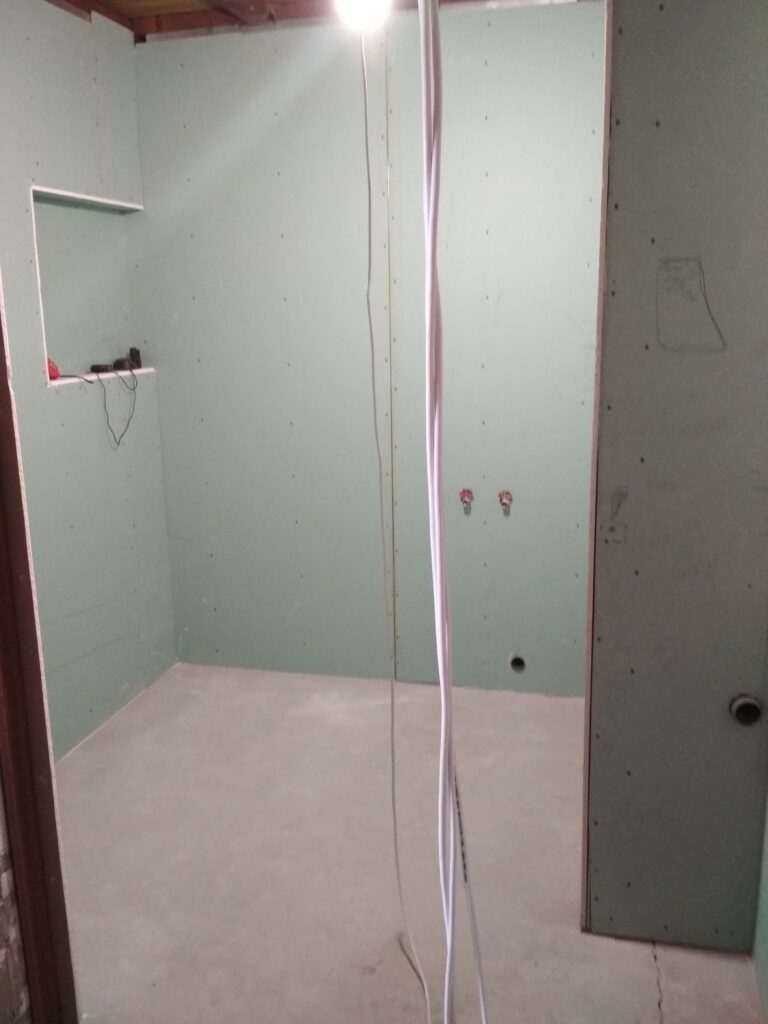
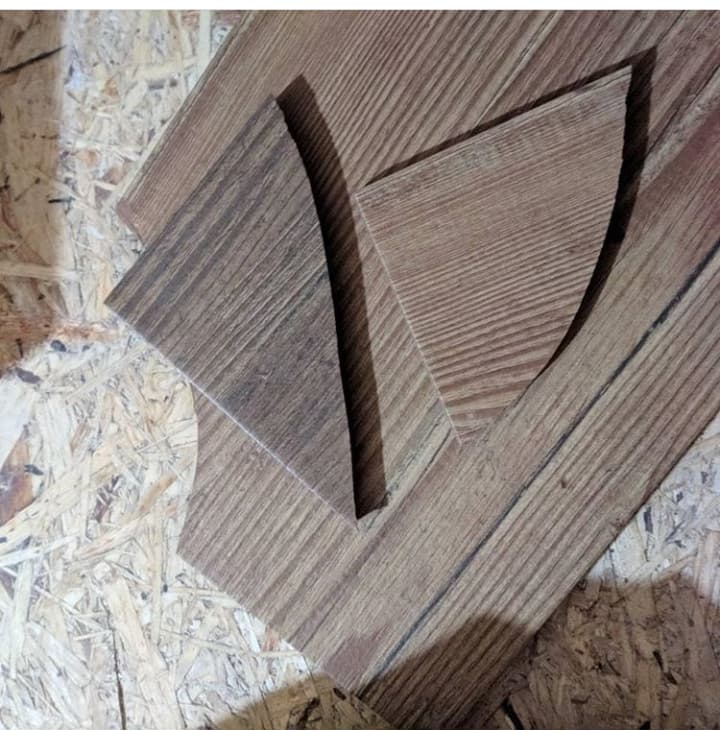
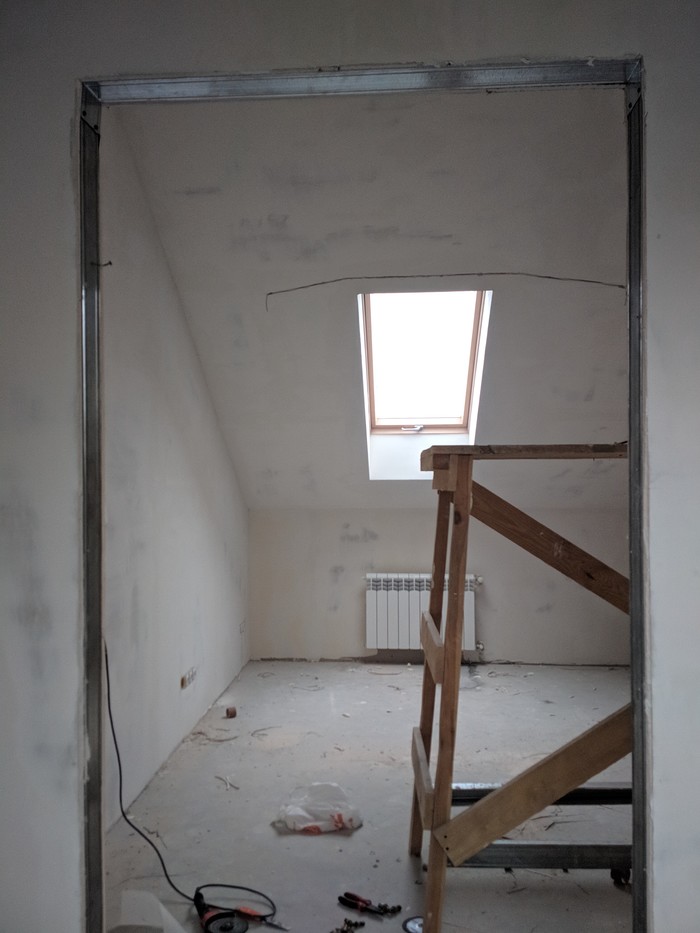
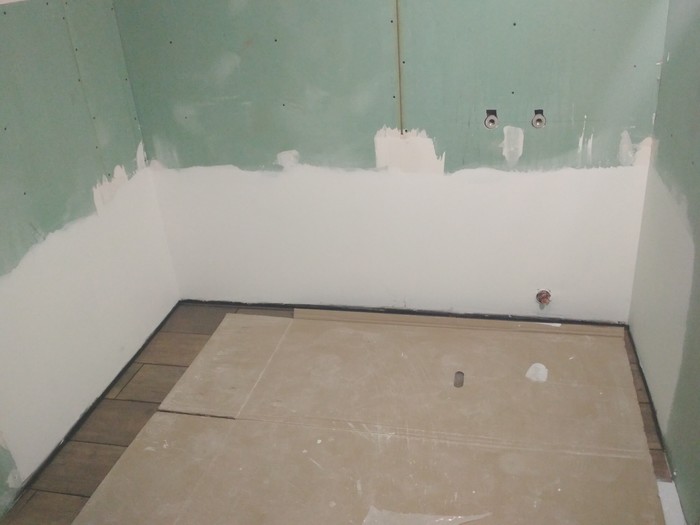
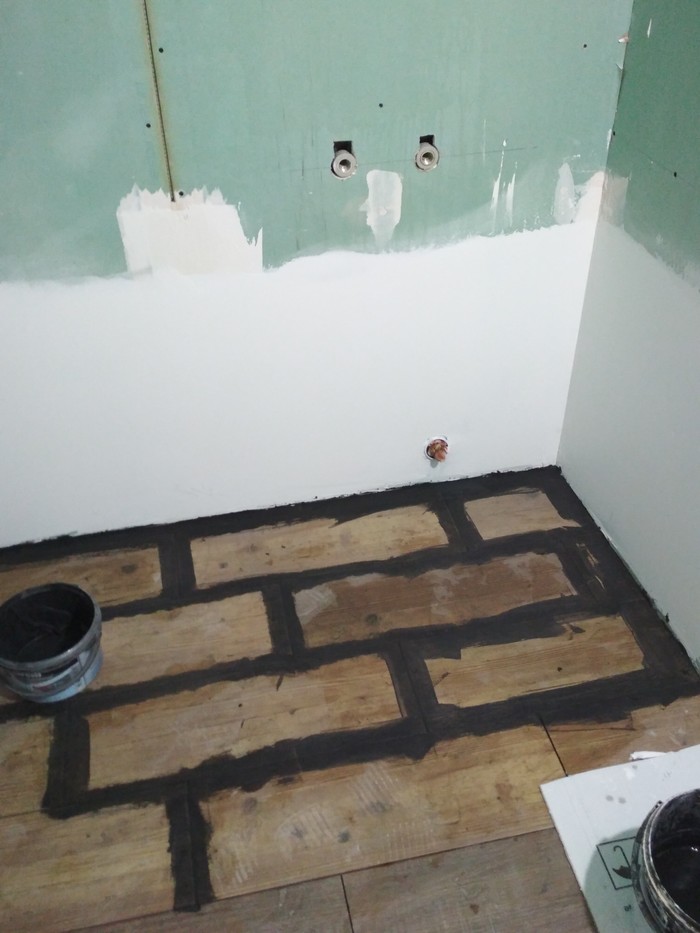
As you can see, we dismantled the walls in the bathroom (and all the others too – they were hollow inside and the profiles weren’t attached at all).
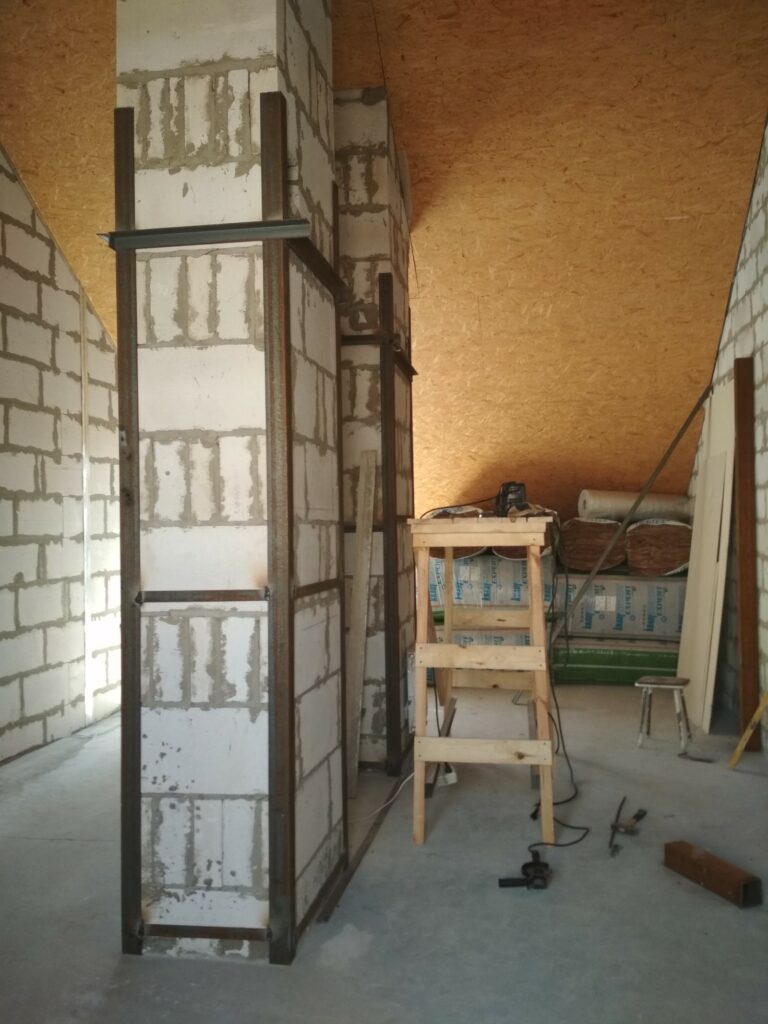
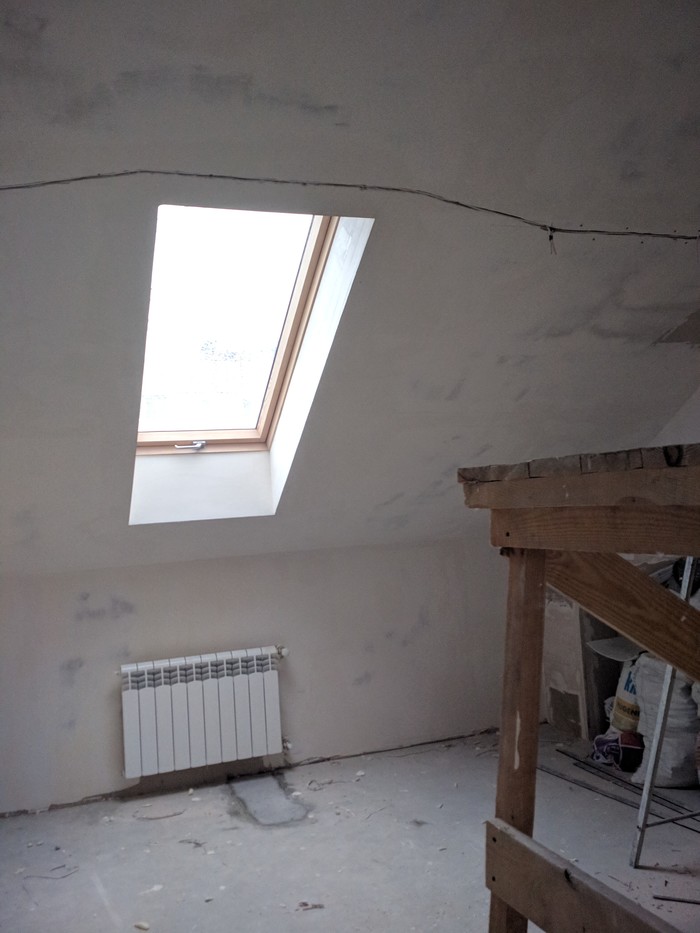
In the background, you can see the slope in the nursery. The sawhorse is in the bathroom. The height of the pipes (along the perimeter of the ventilation ducts) is 3 meters.
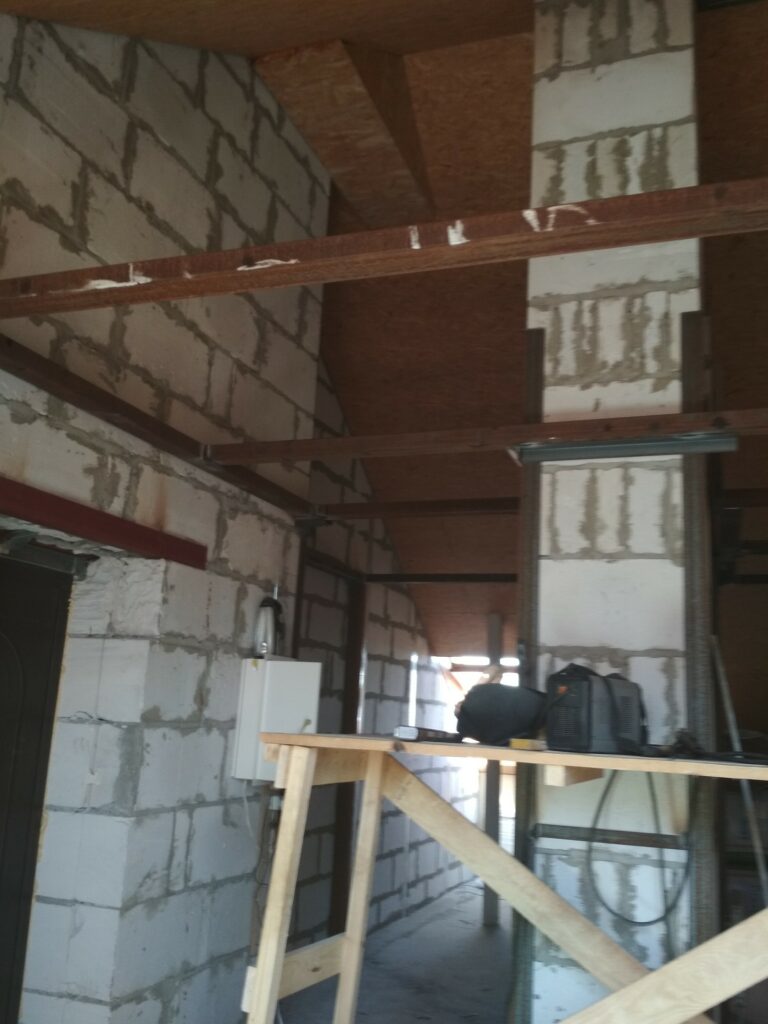
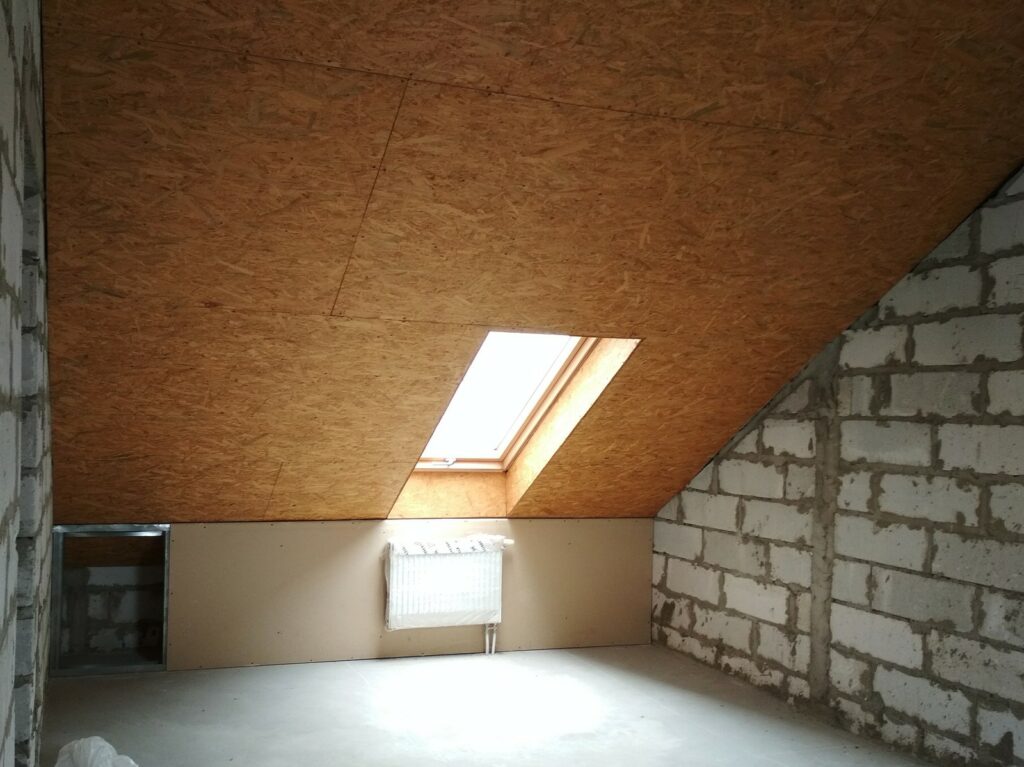
We’ll have tongue-and-groove flooring. The walls are drywall. We’ll use mineral wool insulation in the partitions. We’re insulating the entire perimeter of the slope from the inside with double-sided foil-clad polyethylene foam (12 mm thick) and covering it again with drywall.
The entrance to the attic will be from the hallway. We made the opening as large as possible.
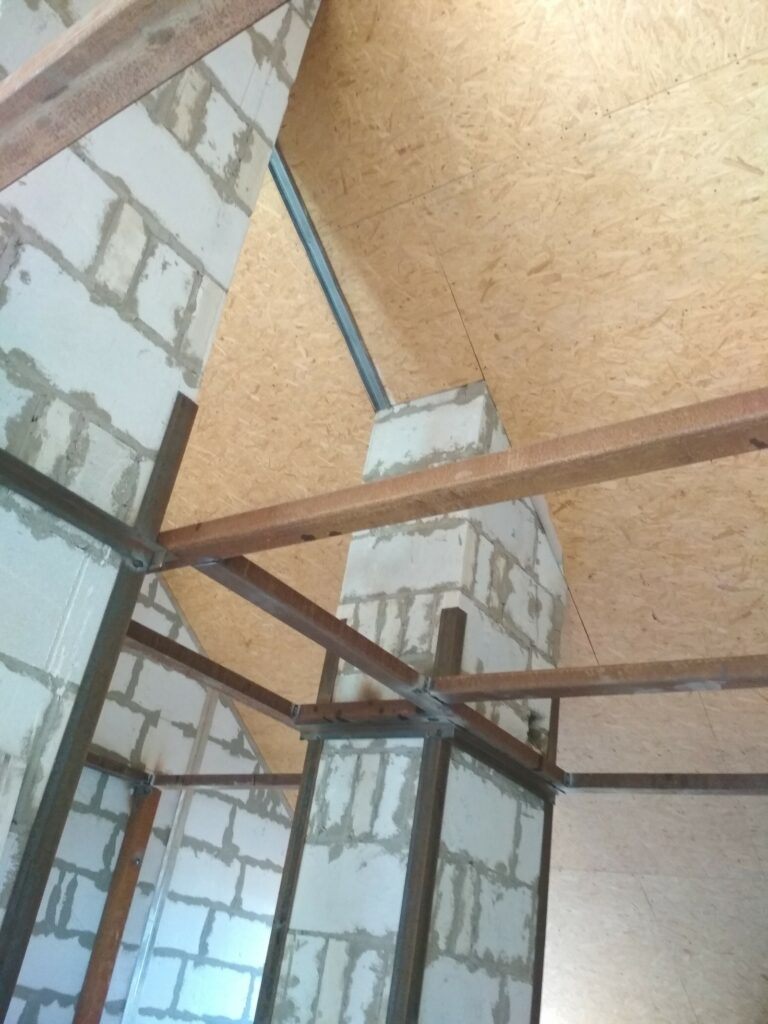
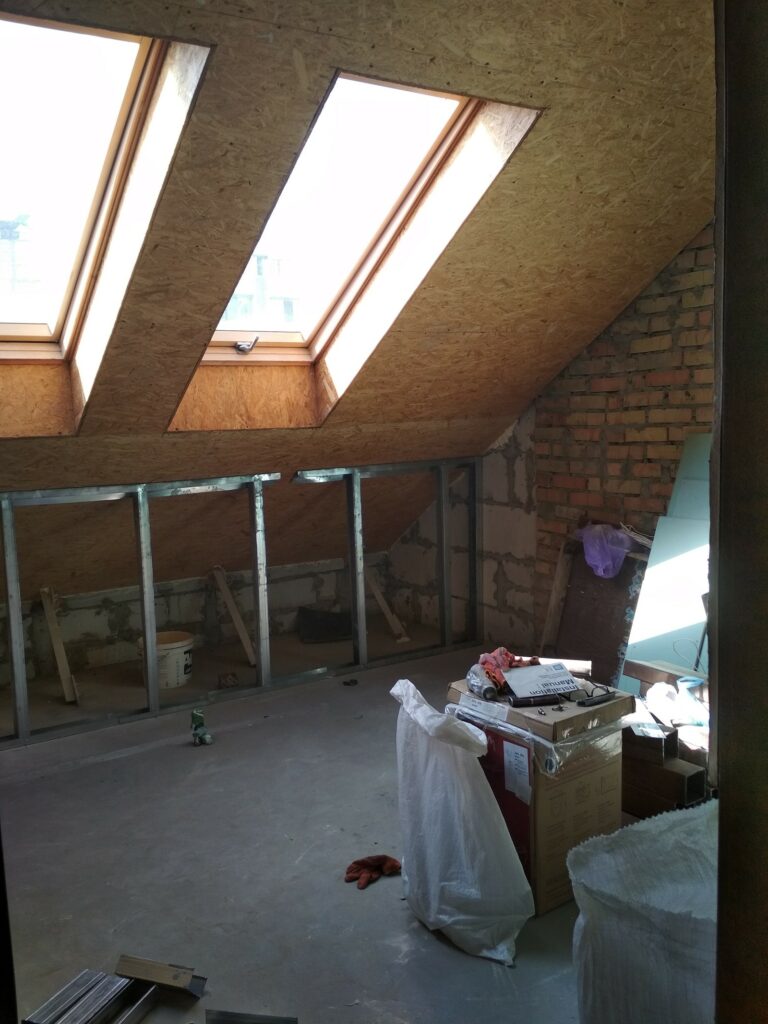
The attic frame is ready. The floor is made of tongue-and-groove boards.
We’re covering the walls with drywall; we’ll put mineral wool insulation in the partitions.
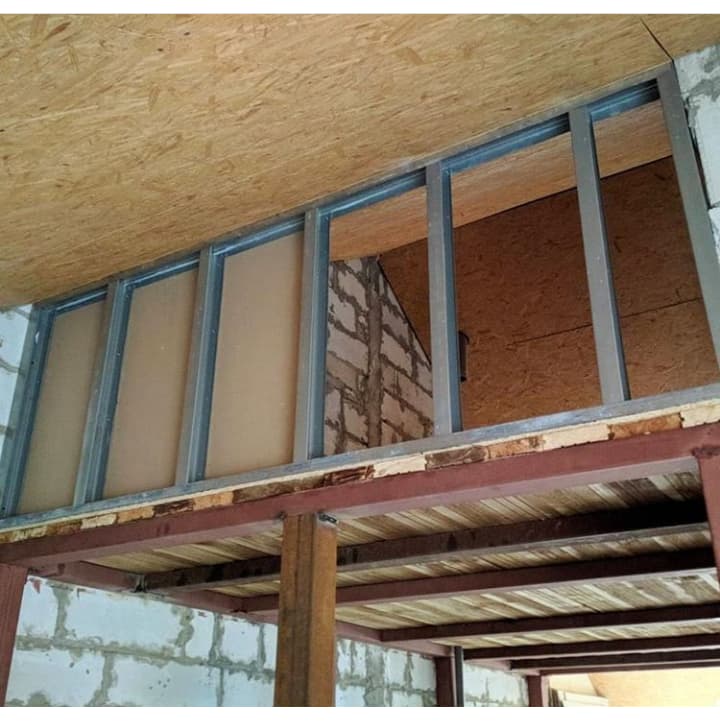
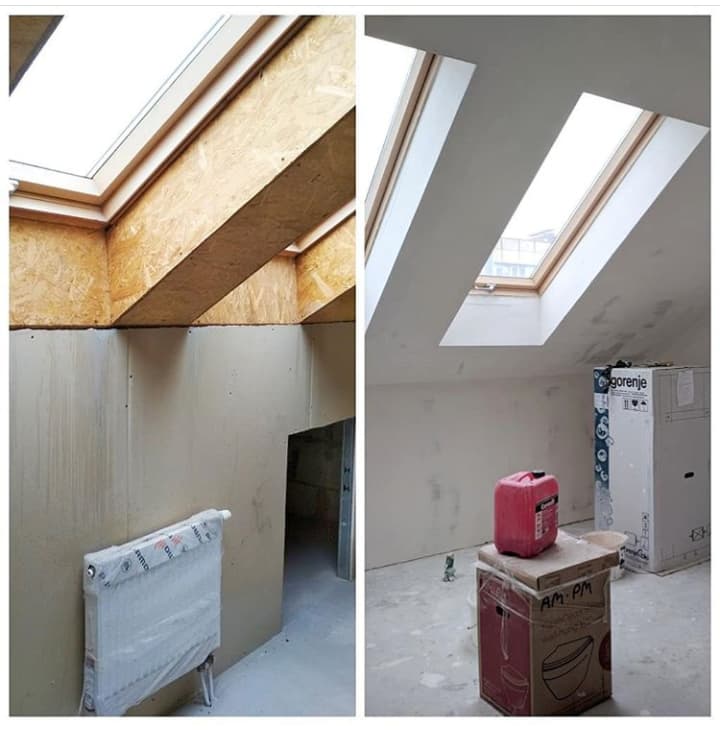
This photo shows the view of the attic from the nursery (the ceiling in the nursery will remain sloped). The kitchen is visible in the background (below). The entire attic space above the bathroom, toilet, and hallway is now usable.
The ladder is waiting for its turn.
And here’s a photo of the finished attic:
We store laminate flooring, tiles, adhesive, and the radiators from the developer up there (we’re hoping to sell them, they’re dry inside and in their original packaging with water flow regulators).
We also bought a toilet bowl with an installation system and a shower set, they also made it into the photo. We bought a bathtub, but there’s nowhere to store it, so we left it at the warehouse.
It’s very convenient to renovate an apartment with an attic. You buy materials, plumbing fixtures, and everything else you don’t need right away and store it in the attic. And it doesn’t take up space in the apartment while you’re working on the walls.
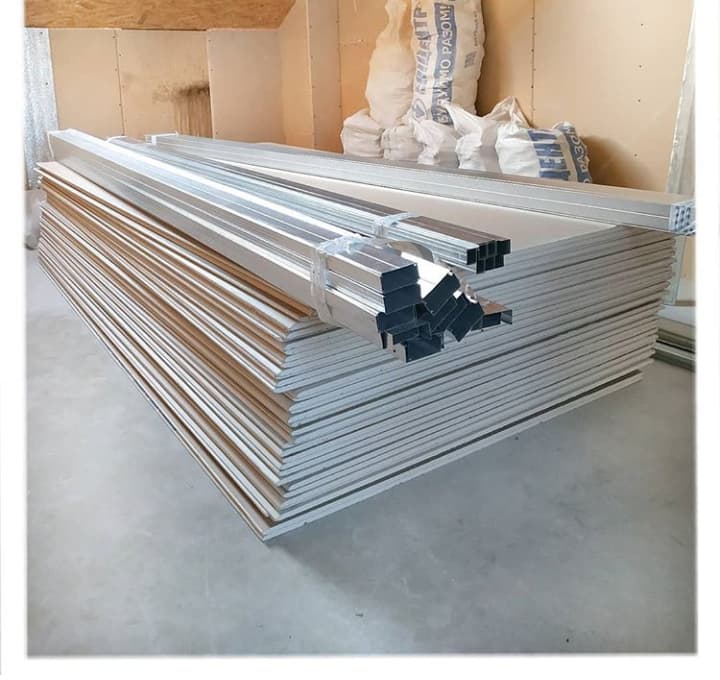
Here are some photos of the materials for the apartment.
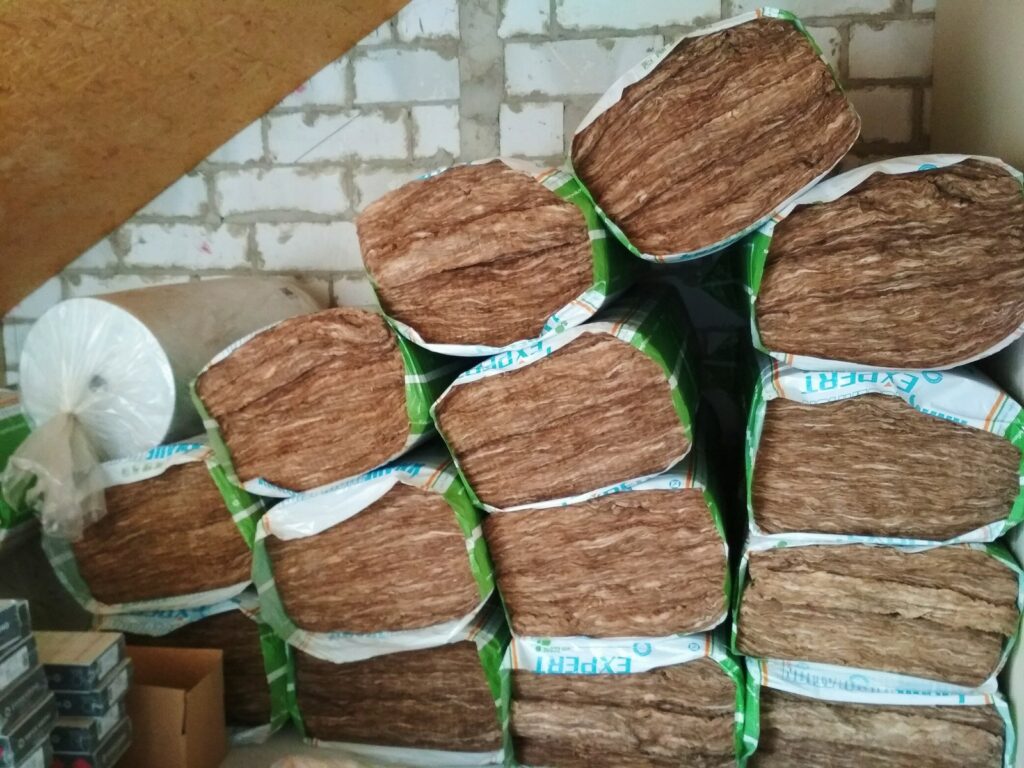
That’s not all the mineral wool (there are a couple more packs in the other room).
We had to buy more drywall too + moisture-resistant drywall for the kitchen and bathrooms.
In total, we used 75 drywall sheets and 159 profiles.
Windows
Continuing with the renovation.
We bought the apartment with 5 Fakro windows:
2 in the kitchen, 1 in the corner of the nursery, and 2 in the large room (one on each side).
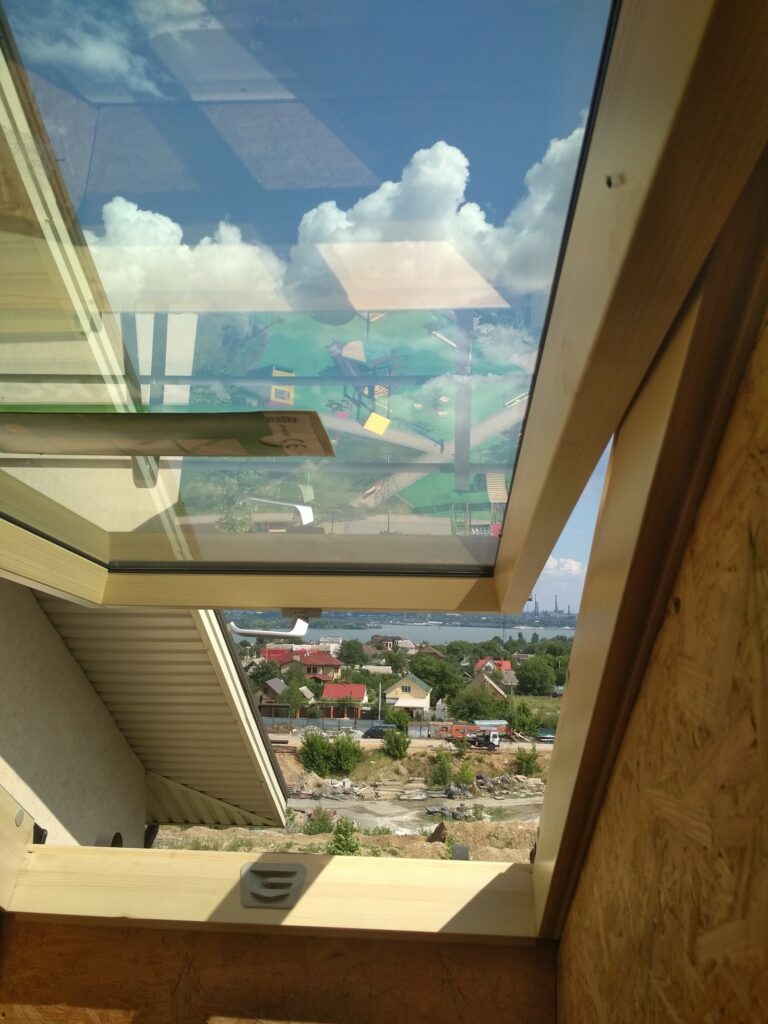
As a reminder, the ceiling in the bedroom is low (80 cm), and the windows are center-pivot. While I (at 164 cm tall) was still able to open them and approach them comfortably, my husband had to bend down (after hitting his head multiple times). So I found windows with an offset pivot axis. Moreover, we decided to add another window in the nursery, under the other corner of the room, for symmetry (and more light).
We decided to move the window from the bedroom to the nursery and install a new one in the bedroom (it’s already in place in the first photo).
Before that, I had to collect signatures from all the residents in our entrance, confirming they didn’t object to us installing a new window (I created a form and 2 plans of the apartment before/after the window installation). That’s how I got to know everyone.
Next, I submitted everything and wrote a statement addressed to the chairman, requesting permission to install a new window. I waited about a month for the house committee meeting. Of course, I attended it. They reviewed several requests, but approved only two (ours and an extension of the roof over the terrace in the townhouse).
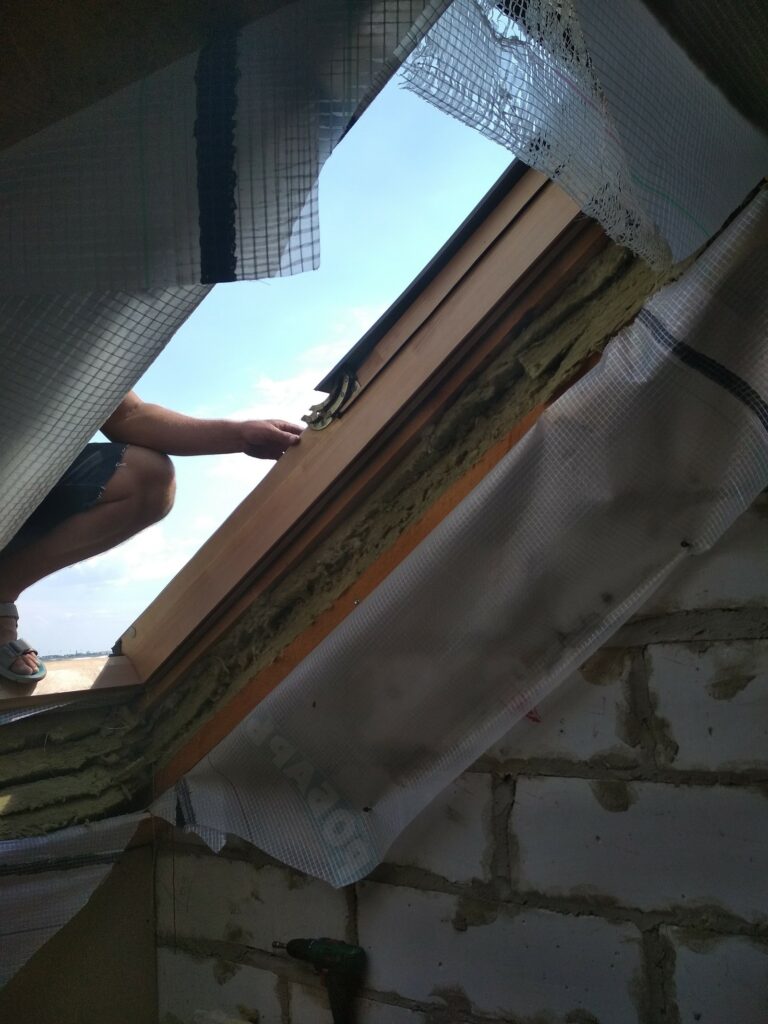
After the good news, we started looking for ways to order the window. Strangely enough, when we called the factory (using their official phone number), they suggested we find a representative in our city to get a better price. And we found one (for those who know the area, it’s near Dubovka, on Gliserna Street). It turned out to be 20% cheaper – $700 (including the installation kit and labor).
Finding an installer was easier. The 8th phase of the residential complex was being built nearby, and they were installing windows in all the buildings, so the worker had no problem installing the new window and creating a new opening for the old one. The work cost $90, and here are some photos of the process.
We’re very happy with the decision to install an additional window. The room is much brighter now 🤗
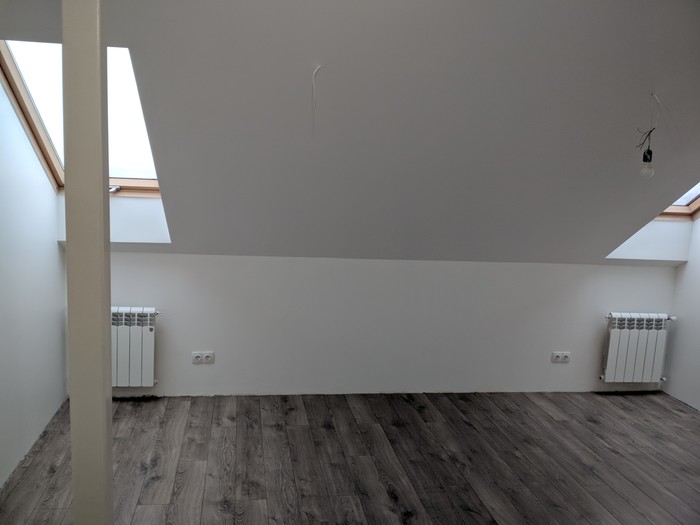
Now the nursery looks like this (this is a recent photo, with new radiators and insulation):
Covering the Walls
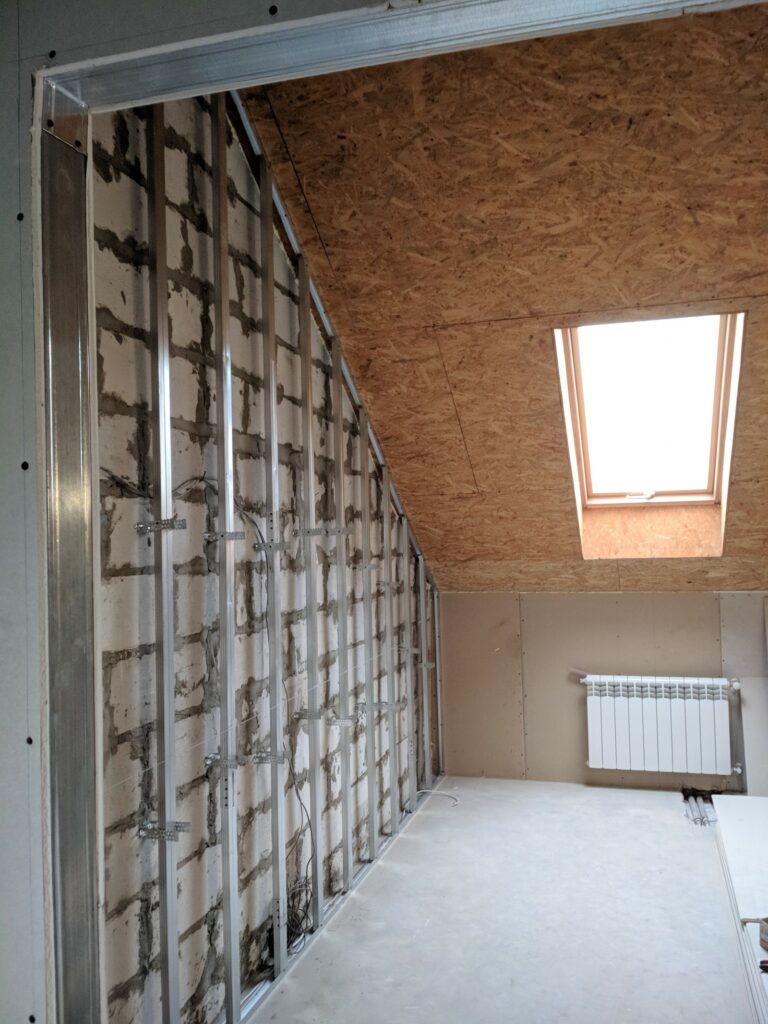
People were asking how we attached the drywall to the walls. This is how we did it. All the rooms are already covered. This is the last one.
We installed the radiators (we’ll have heated floors in the kitchen, bathroom, toilet, and hallway). Now the boiler is set to 40°C, and the apartment is comfortable enough to work in wearing just a T-shirt.
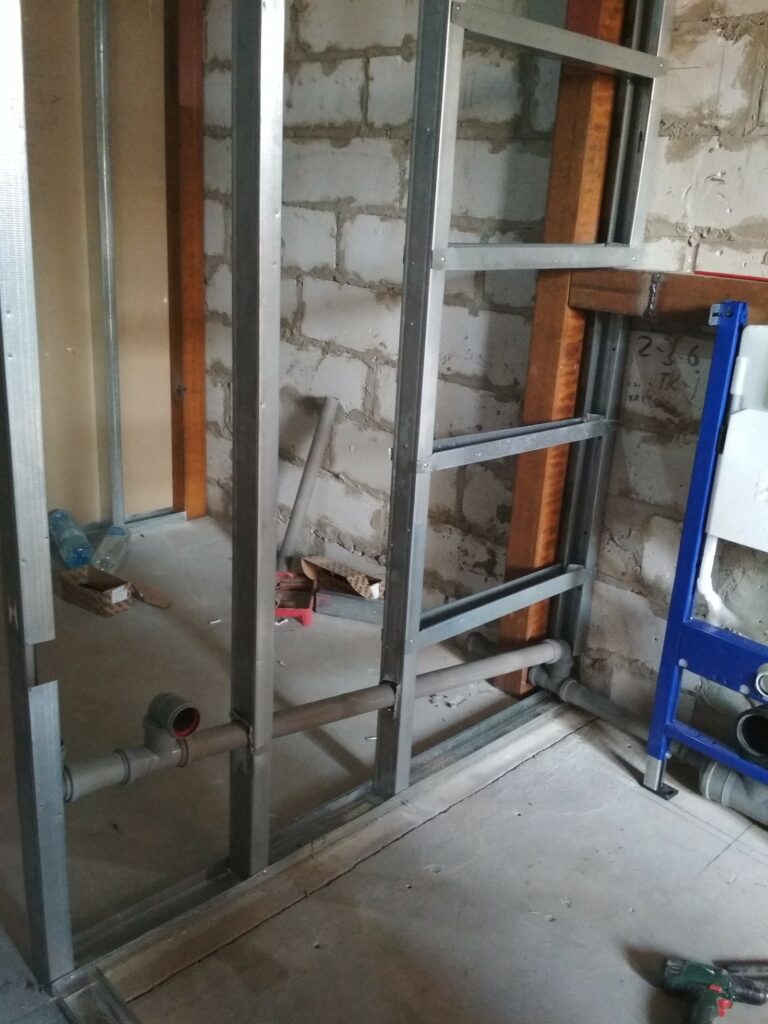
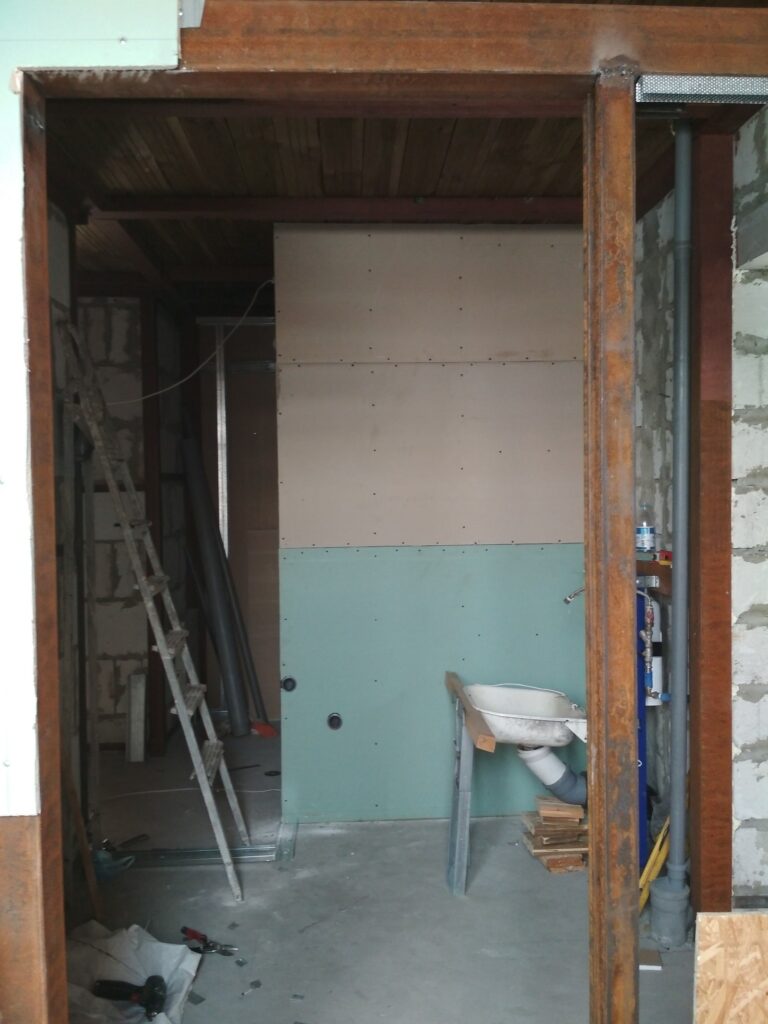
Here are some progress photos of the plumbing and toilet installation:
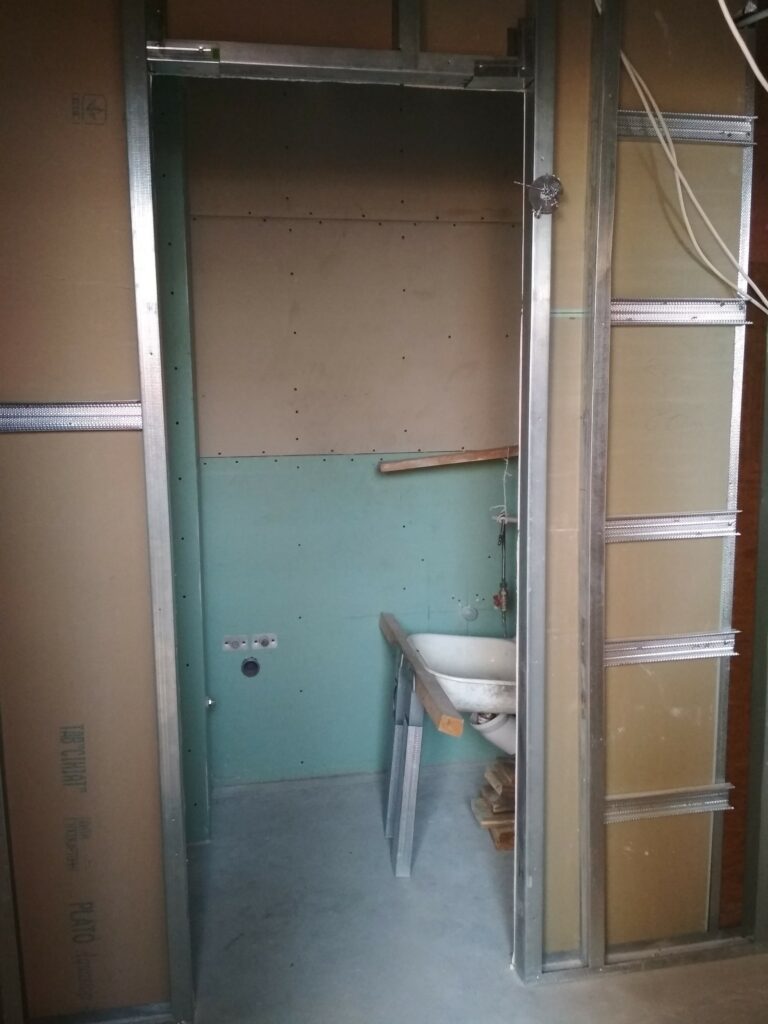
This is the wall between the toilet and the bathroom.
This is the kitchen with two windows)
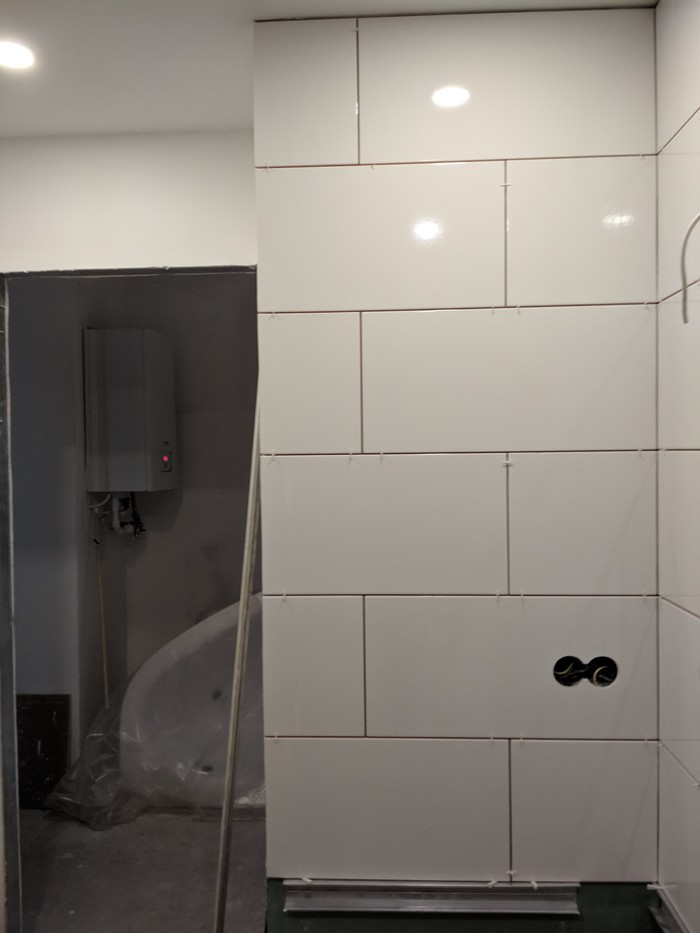
This is the toilet. It’s already covered with drywall).
And this is the bathroom.
Finishing the Walls
Photos for those who love BEFORE/AFTER 😉
I love them too, but I completely forgot to take proper photos. This one was accidental 🤗
And now some photos of the intermediate results.
A photo of the nursery with the new window.

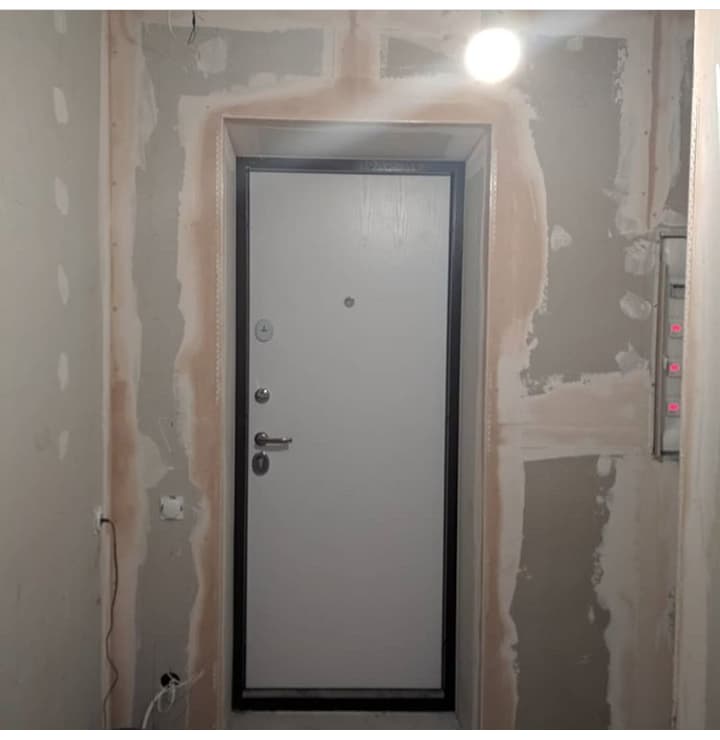
View of the entrance door from the hallway.
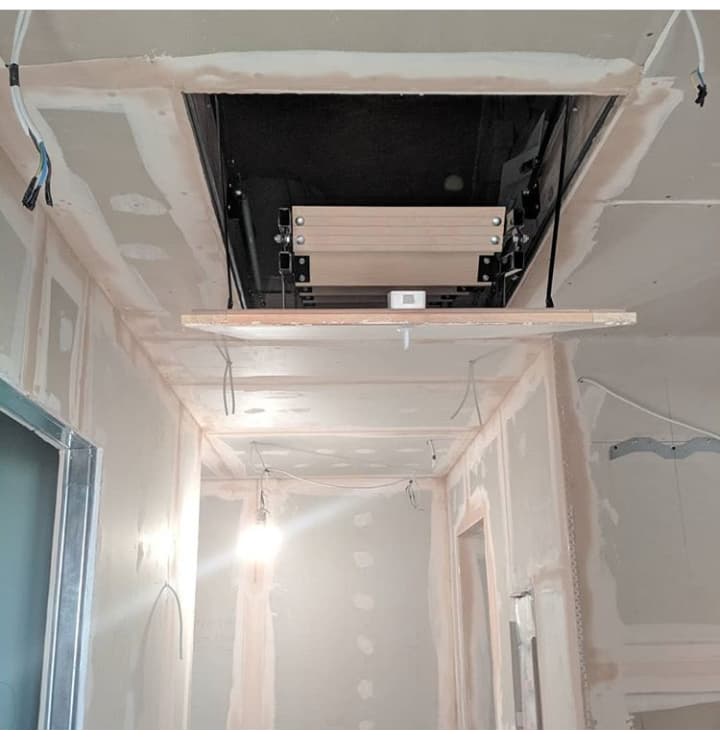
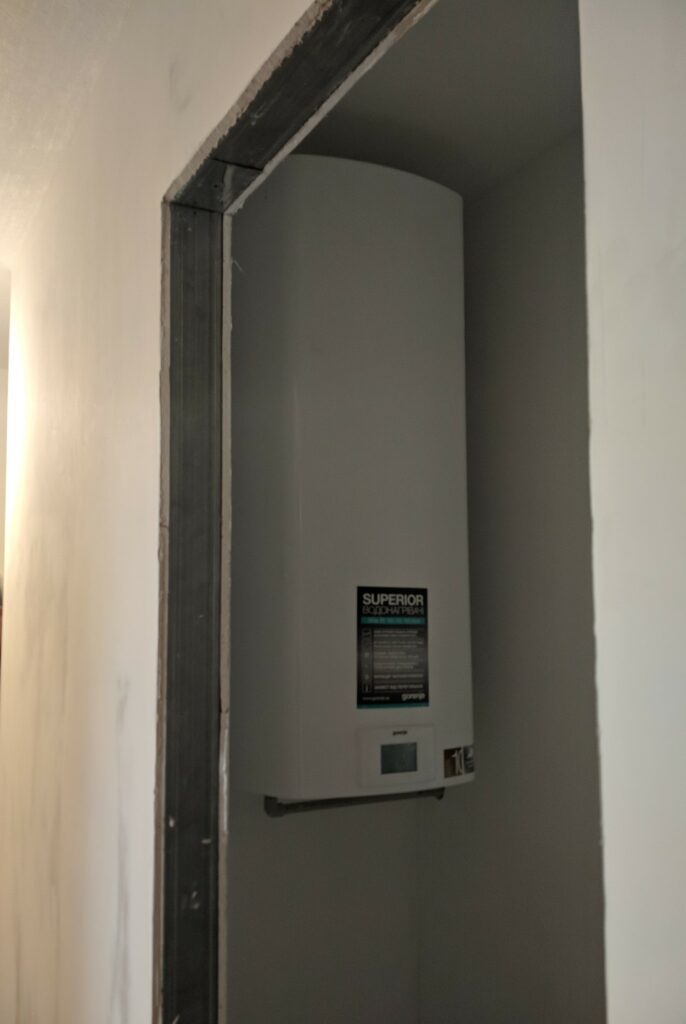
View from the nursery towards the hallway. You can see the stairs above. Our 6kW Skat water heater is on the right.

The staircase itself 💪 I was finally able to go up to the attic and walk around. Found one downside: I’m scared to go down the stairs from the attic. We need to install a railing at the top so I can hold onto it (and not the floor) when I step on the first step. But it’s just me who’s scared, my husband has no problem with it.


And this is the toilet with the plumbing manifold above the installation system. The hole is for the extractor fan.
The water heater is hanging in its niche. It’s not filled with water yet.
We’re gradually getting closer to the finishing touches.
Electrical
I’m not claiming to be an expert or a master electrician. I’m just sharing how it’s done in our case.
We don’t have gas. Everything is electric. The apartment has three phases. By the way, we just recently replaced the meter with a multi-tariff one. Now we have a day/night tariff.
Here’s a photo of the electrical panel assembly.
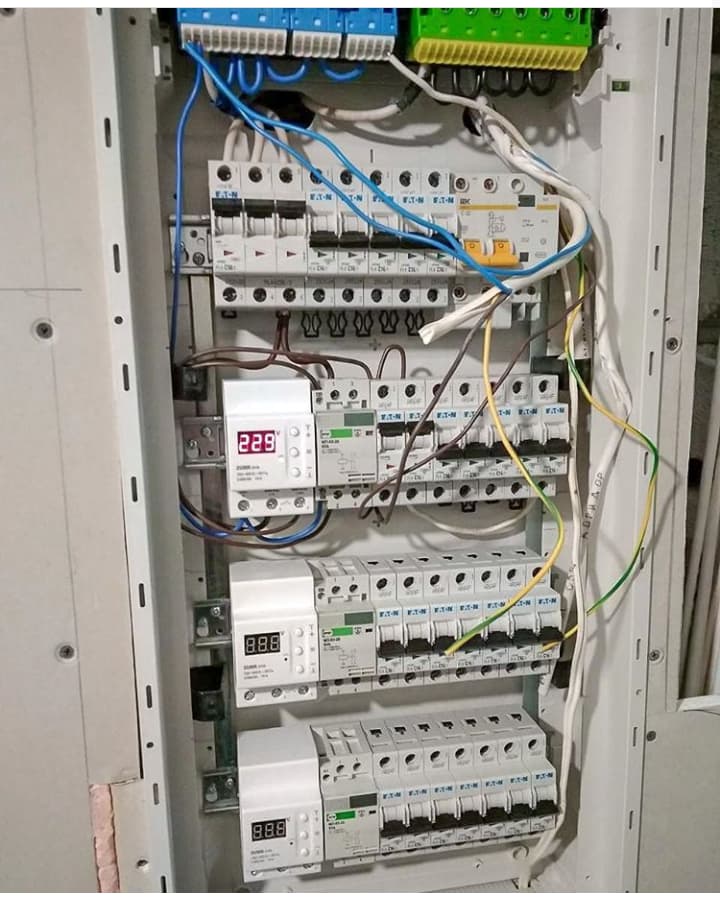
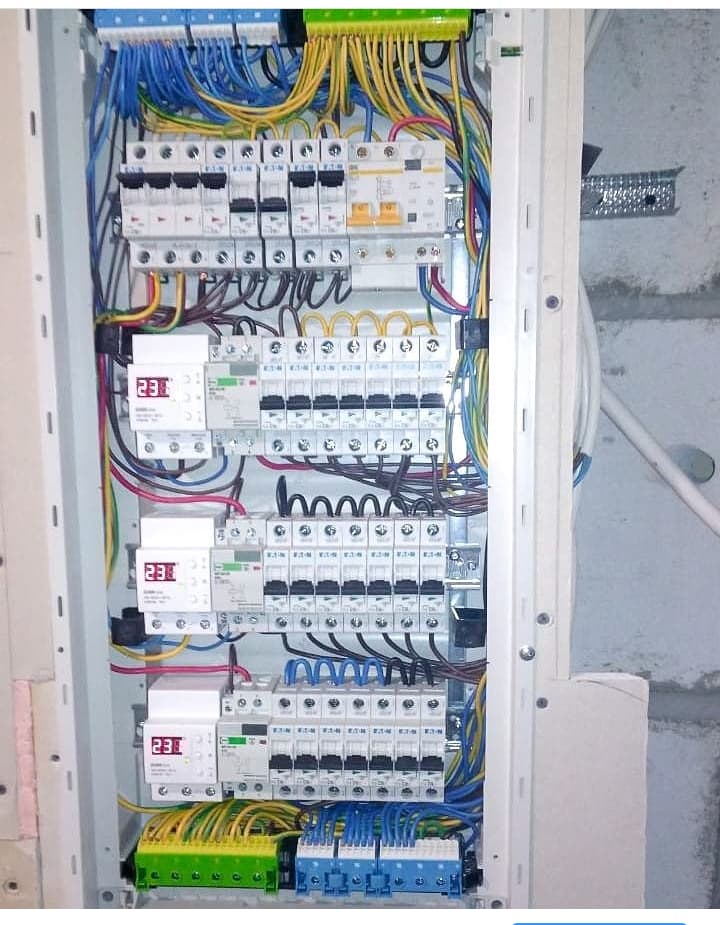
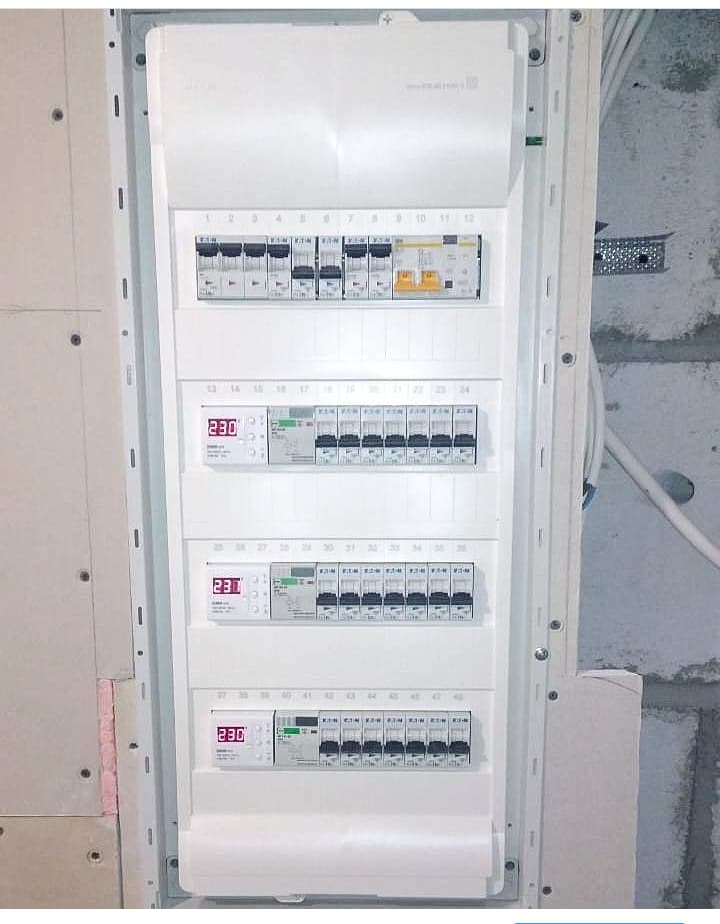
There will be stickers under each circuit breaker soon. I want to arrange them by color.
There’s also a white door. Later, we’ll cover the panel with a poster or a photo.
We have about 50 outlets in total throughout the apartment (I didn’t count them exactly + outlets for large appliances). Of these, 10 are in the kitchen above the countertop + one for the refrigerator, near the table, and one for the TV. 15 outlets in the nursery.
We have three-way and intermediate switches in the hallway. The lights turn on (or off) when you enter the apartment, near the nursery, and near the living room. Other than that, nothing special.
Puttying the Walls
I decided to add a short video, even though it’s not very recent (the nursery is already completely covered, plastered, and has fiberglass mesh tape on the walls).
Tiles
While I’m on the subject of renovation, I’ll share some of our mishaps.
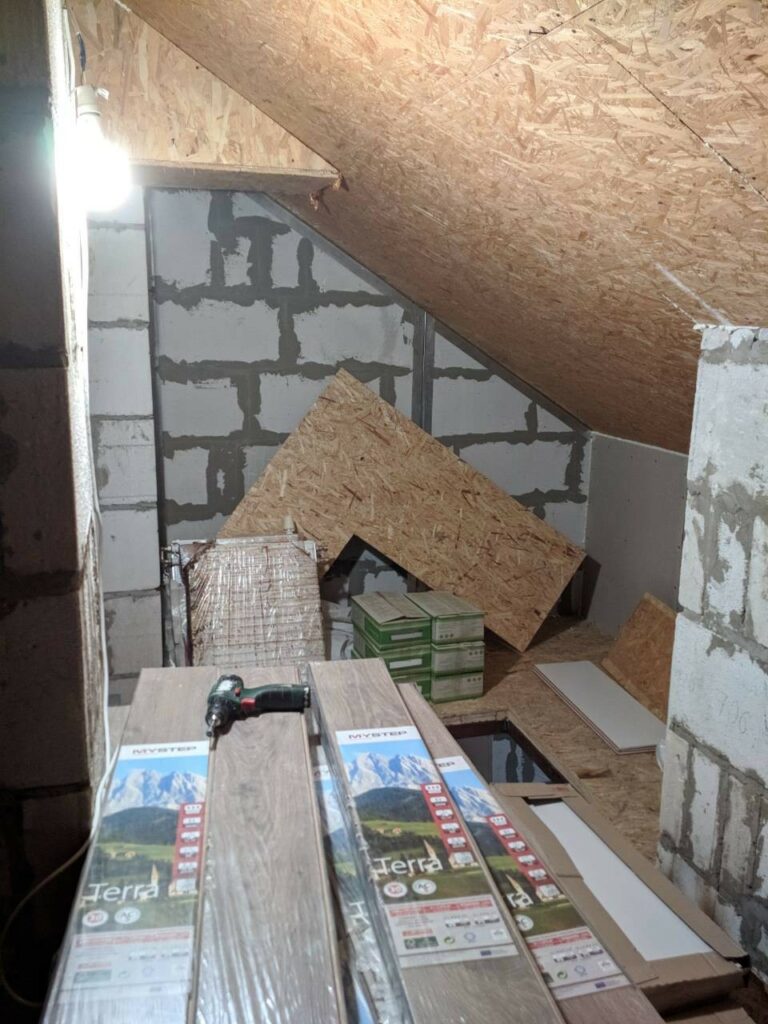
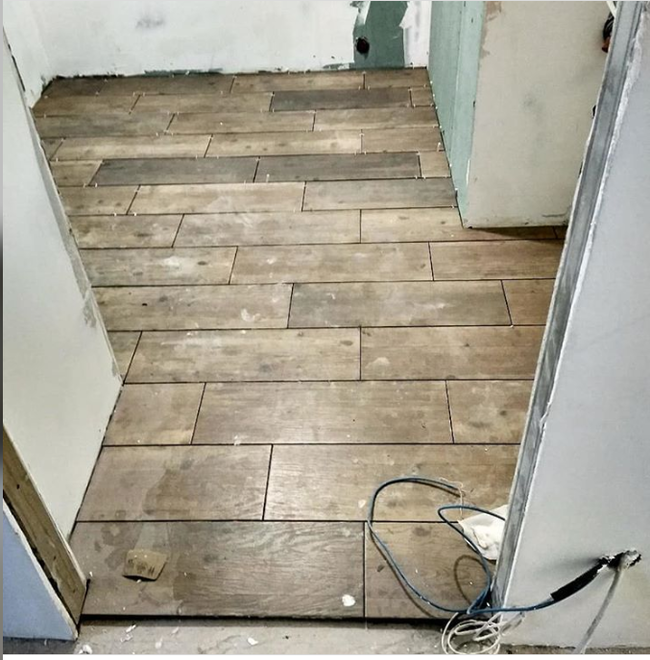
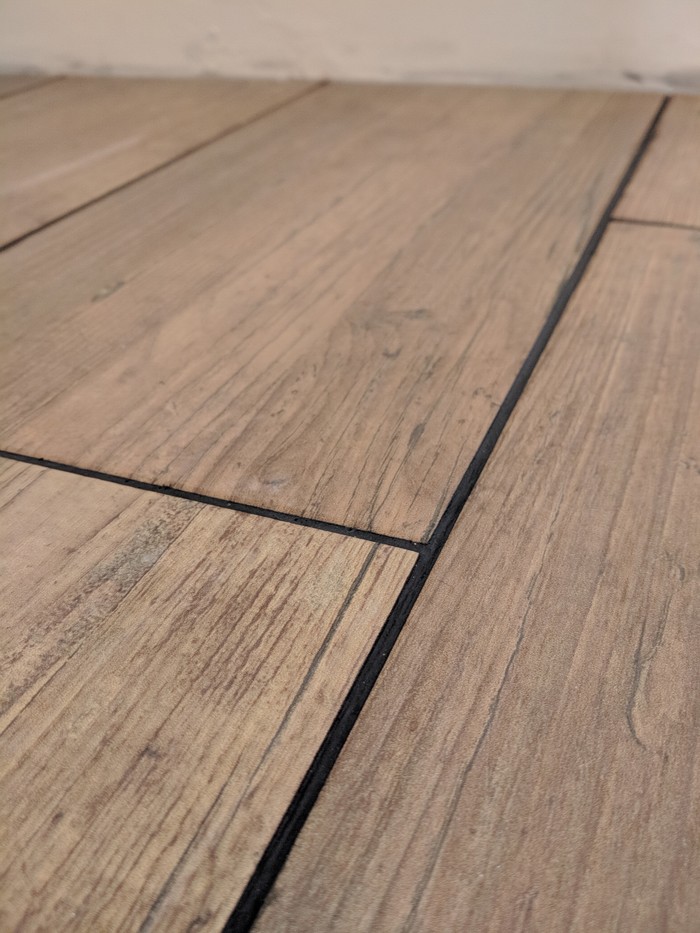
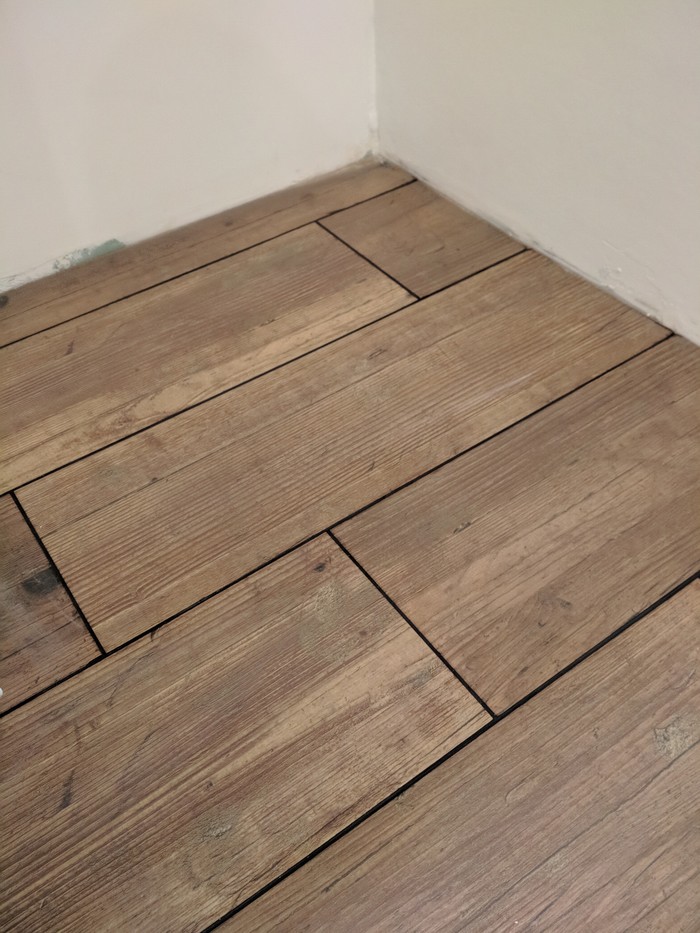
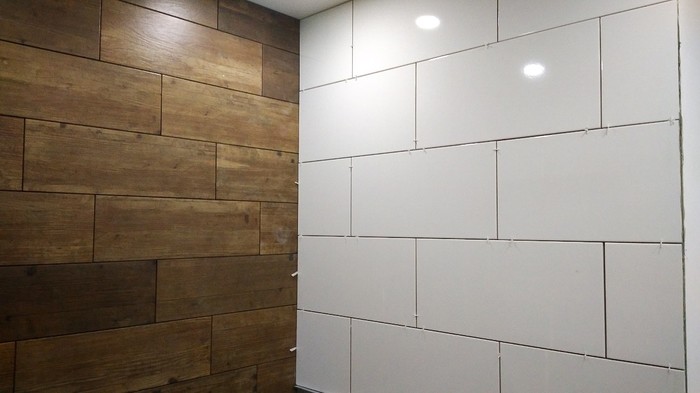
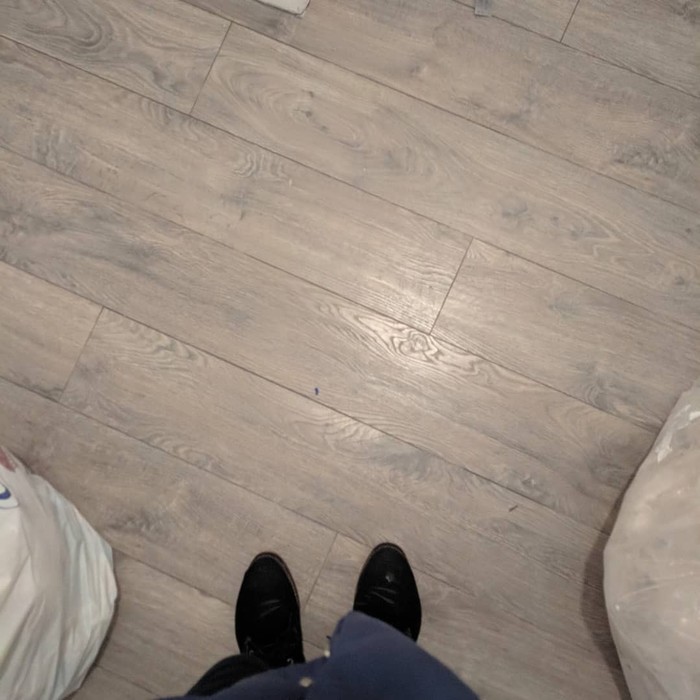
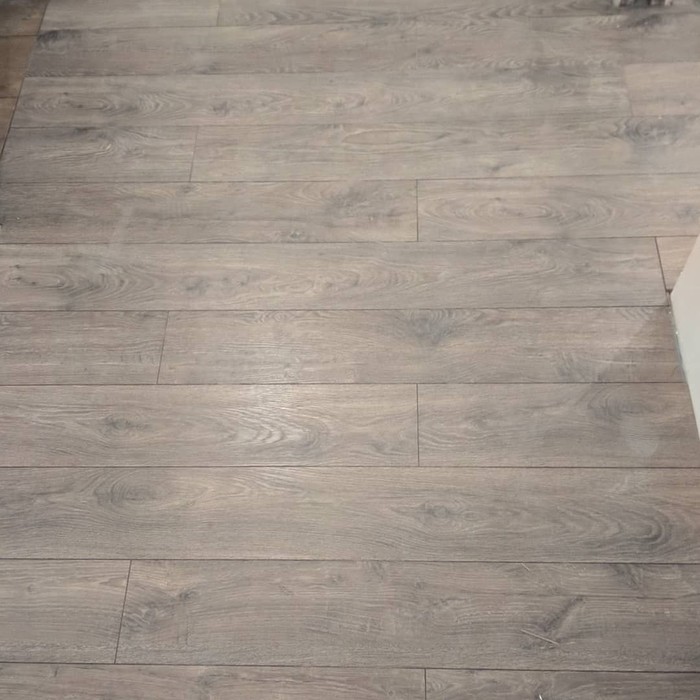
The apartment is designed in a Scandinavian style: white walls and ceilings, a unified space thanks to the flooring: laminate everywhere (Oak Vienna, My Step – we already bought 77 sq. m.) + wood-look tiles in the bathroom and toilet.
We bought the laminate a long time ago, so we were choosing tiles to match. And we found tiles that were a perfect match. But they were out of stock in every single Epicenter store and generally in the entire country. And we couldn’t even order them (so why are they on display? /Frustrated/)
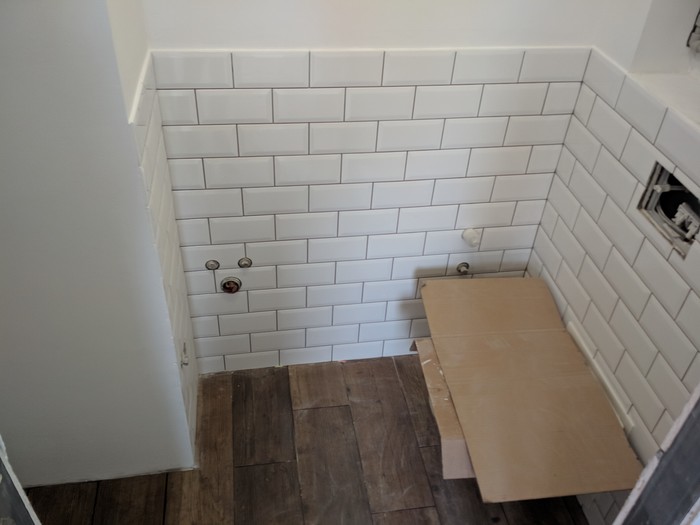
We had to choose another nice wood-look tile + large white tiles for the bathroom walls and white metro tiles for the toilet.
Spoiler alert: the metro tiles were the only ones that didn’t cause any problems.
My husband works from 9 am to 7 pm. I’m a student, so I’m free after lunch. We bought the tiles from Epicenter. And we also ordered their delivery (after all, there were a lot of boxes, and we don’t have a car yet).
1. I’m frustrated with the delivery. You can’t choose a specific time. The only options are before lunch or after lunch. Nobody cares that I need to hire movers (I can’t carry it up to the 6th floor by myself), that they charge by the hour, or that I might have other things to do besides sitting around from 12 pm to 5 pm waiting for the delivery in an apartment where there isn’t even a chair to sit on.
They arrived an hour earlier than we’d arranged with the movers (I barely had time to get there). And what happened next? I (in case you’re wondering, I’m 163 cm tall and weigh 53 kg) unloaded the truck full of tiles by myself!
Just to give you an idea:
– 11 boxes of Tarima Roble 20.5*61.5 tiles, 23 kg each
– 6 boxes of Mono White 25*75 tiles, 13 kg each
+ 4 bags of tile adhesive, 25 kg each, and 2 bags of CM17 adhesive for heated floors, 25 kg each.
And it was all me. The driver helped by handing me the boxes at the edge of the truck bed, but he’s not a mover.
Thank you very much, Epicenter, my arms still hurt when I remember it.
2. The quality of the tiles. Mono White (Carpathian Ceramics) 1st grade (yeah, right) – terrible. Scratched glaze, imperfections on 6 out of 8 tiles in the box. Returned.
And then there was the issue of damage. Unfortunately, I couldn’t check everything myself (and I had absolutely no desire to do so, I was waiting for the movers).
They brought everything up quickly and left. The next day (Saturday), after work, my husband and I went to check the tiles. And that’s when we discovered the “excellent quality” of the white tiles and a lot of broken wood-look tiles.
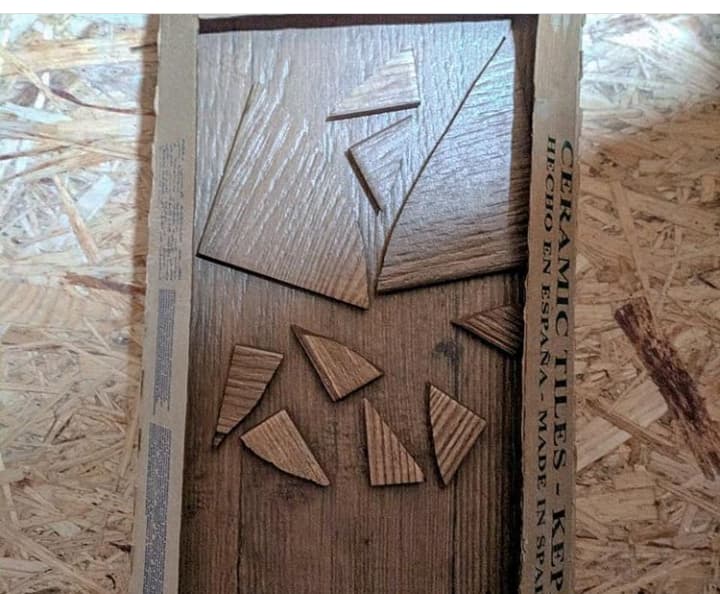
Every box had at least one broken tile, and one box had two. We collected 10 broken tiles in total. Called a taxi, took the receipt… Called a friend (thanks, Zoom, for moving to our neighborhood) to help us carry all those tiles down from the 6th floor.
The return process went smoothly. It took about 20 minutes. They replaced the wood-look tiles and refunded the white ones.
Turns out taking a taxi from Epicenter is inexpensive (compared to their delivery fee) – 130 hryvnias vs. 250. And you don’t have to wait around for them to show up.
Now I understand why people aren’t too fond of renovations (besides the fact that all your money disappears). Hang in there!
Meanwhile, we’re finishing up the ceilings and will soon move on to laying the heated floors.
Plumbing
We’ve acquired some plumbing fixtures.
Let’s start from the beginning.
Our toilet bowl and installation system.
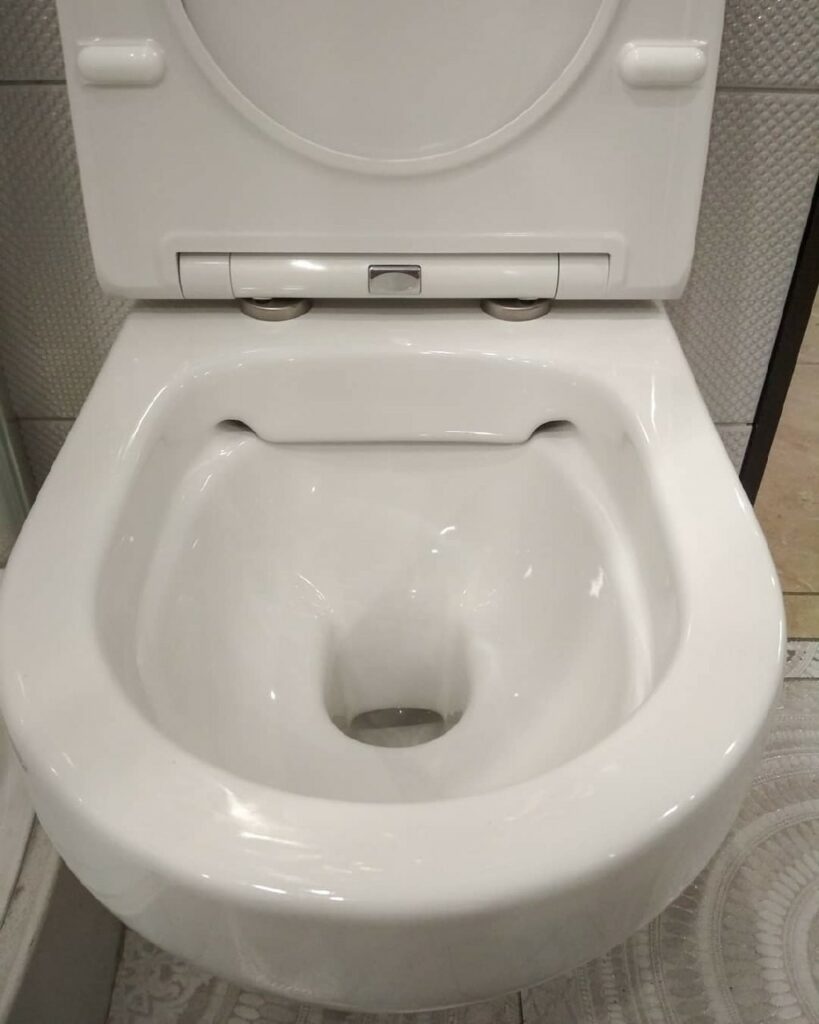
So, we chose the AM.PM INSPIRE FlashClean C501700WH wall-mounted toilet bowl with a soft-close seat.
- No unnecessary curves on the outside.
- Rimless bowl (no more nasty germs under the rim 😂).
- Anti-splash system 😏.
- Soft-close seat that’s easy to remove with a single button press (see the video in the carousel).
- 25-year official manufacturer’s warranty on the toilet bowl (Germany).
By the way, they have a service center in Zaporizhzhia).
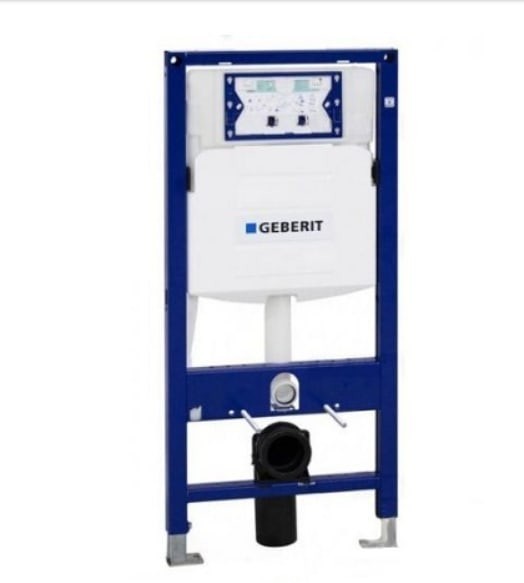
We had some difficulties with the installation system. The flush plate we liked had to be ordered and would take a month to arrive 😱 I’ll look for the same one online…
It’s a GEBERIT DUOFIX installation system with a Delta flush plate. The sound-absorbing mat is not included.

From Epicenter, we went to Ravak, where we’d already had our eye on a bathtub, and chose a shower set right there.
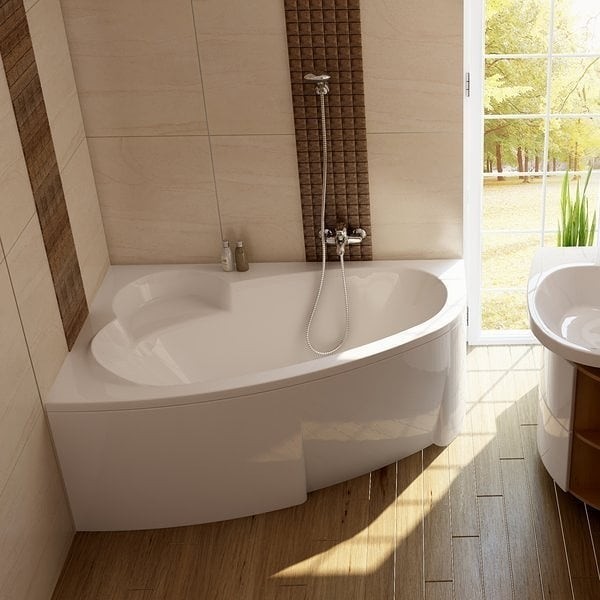

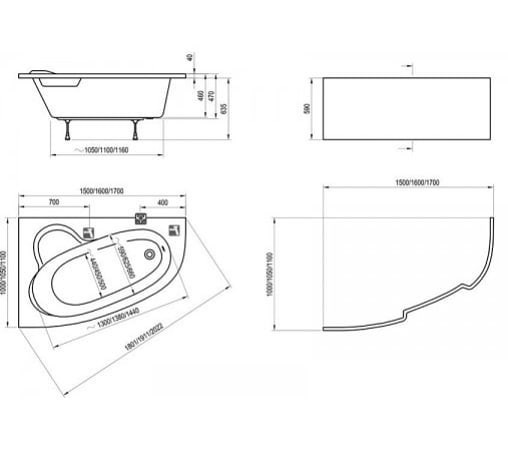
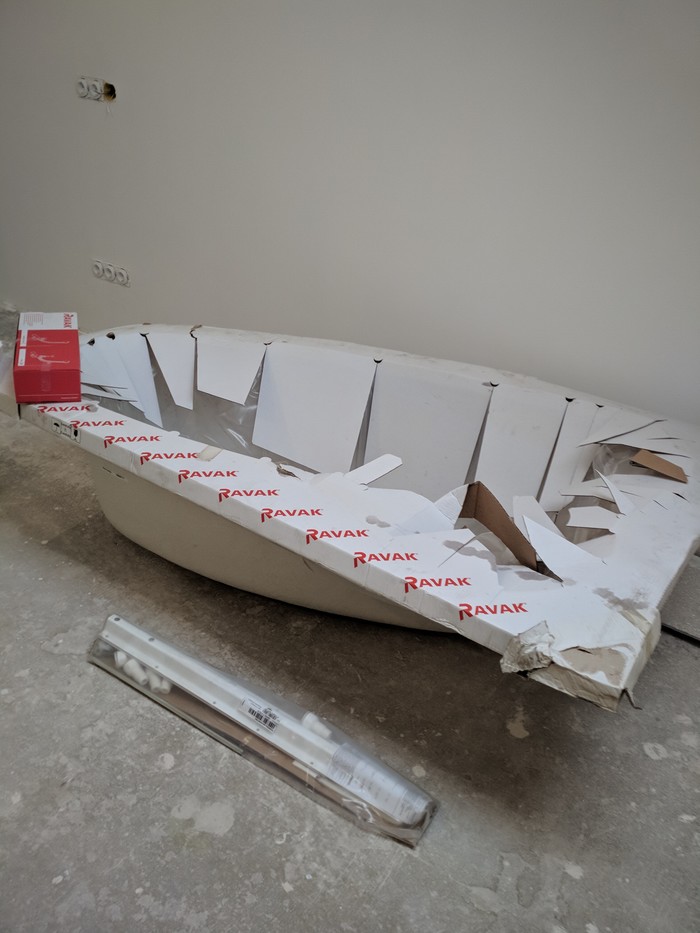
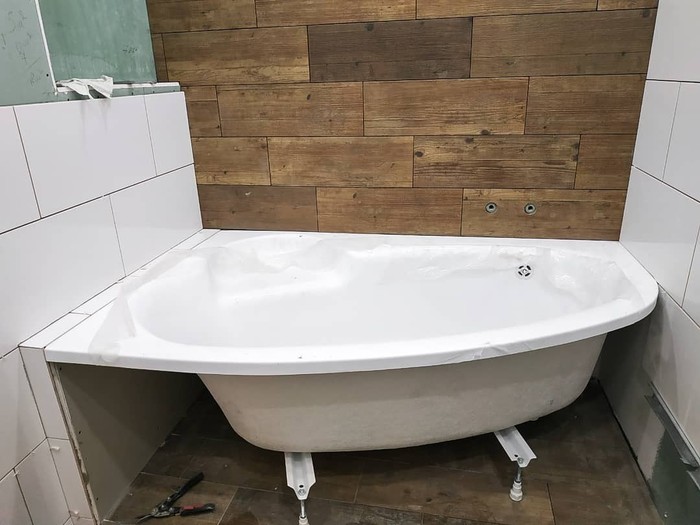
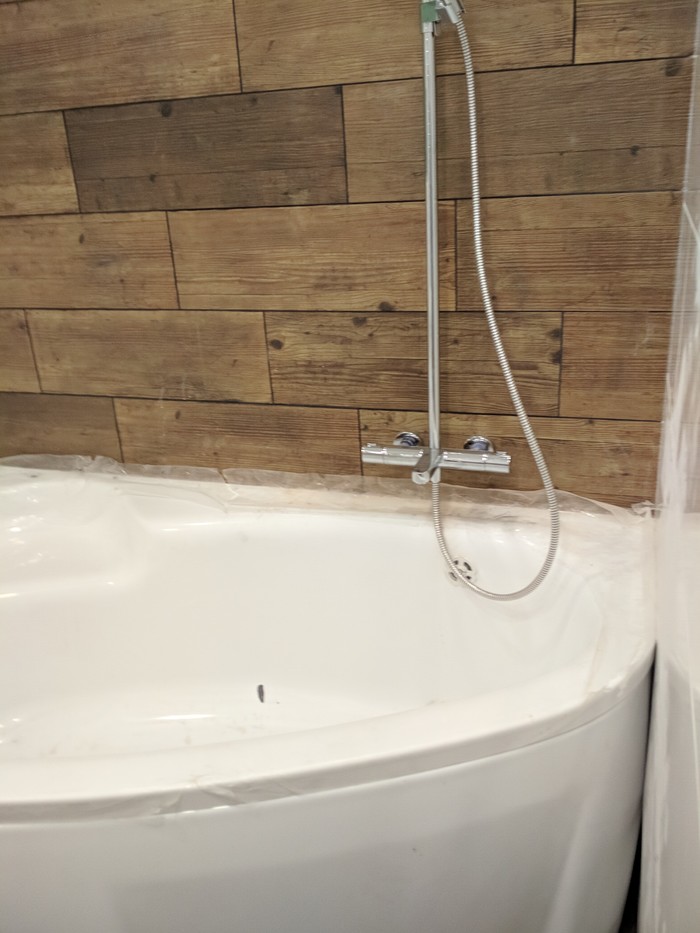
This bathtub is our dream come true 😍 We used to call it a corner bathtub, but the correct term is asymmetrical 🤷 Well, it doesn’t make it any worse 😂
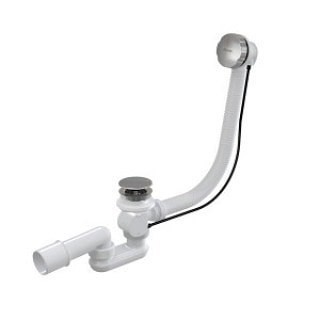
Our beauty is the left-hand Ravak Asymmetric 170*110 cm. In addition to the bathtub itself, the set includes (purchased separately): a front panel + support + a drain kit with a cable-operated drain.
- Material: acrylic.
- The bathtub has a comfortable built-in seat.
- Easy access to the bathtub thanks to a small recess in the panel.
- Volume: 240 liters, weight: 29 kg.
They have discounts at the store right now 🤑 The price is calculated in euros and converted to hryvnias at the checkout 💱 As a result, we saved 800 hryvnias on the bathtub compared to the website price. And that’s not counting the promotional discount (at Epicenter, this set costs 1,000 hryvnias more than on the website).
Pleasant bonuses:
- Free delivery of Ravak products within Ukraine.
- After payment, the product is delivered to your city and stored in a warehouse for as long as you need (some people have had theirs there for a year 😳 – bought it on sale + the dollar hasn’t gone up yet, and it doesn’t take up much space 👌).
- When they deliver your order, they’ll give you a free bathtub care product.
- 10-year warranty.
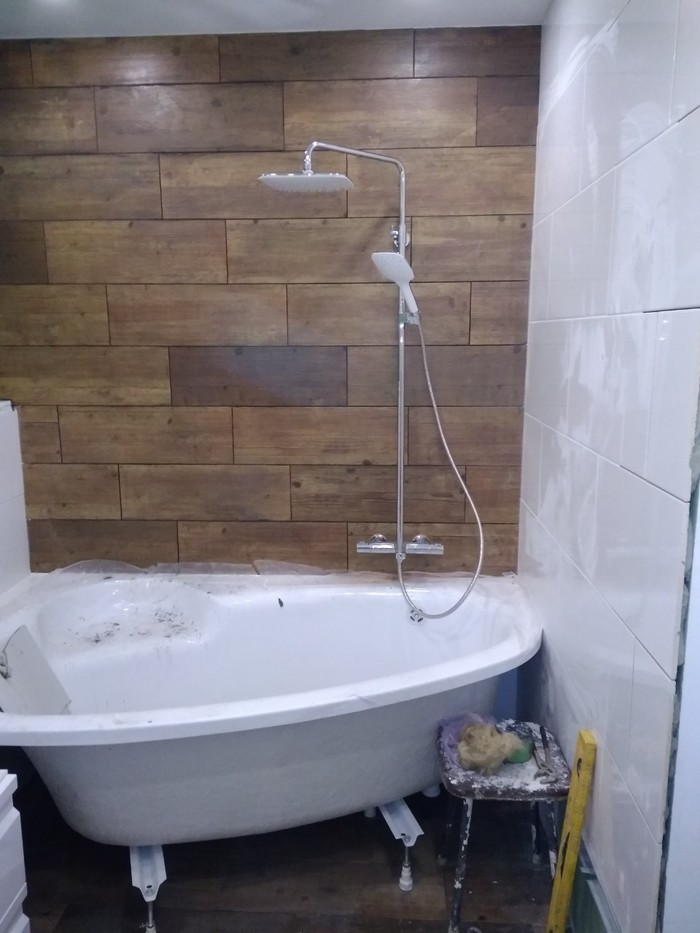
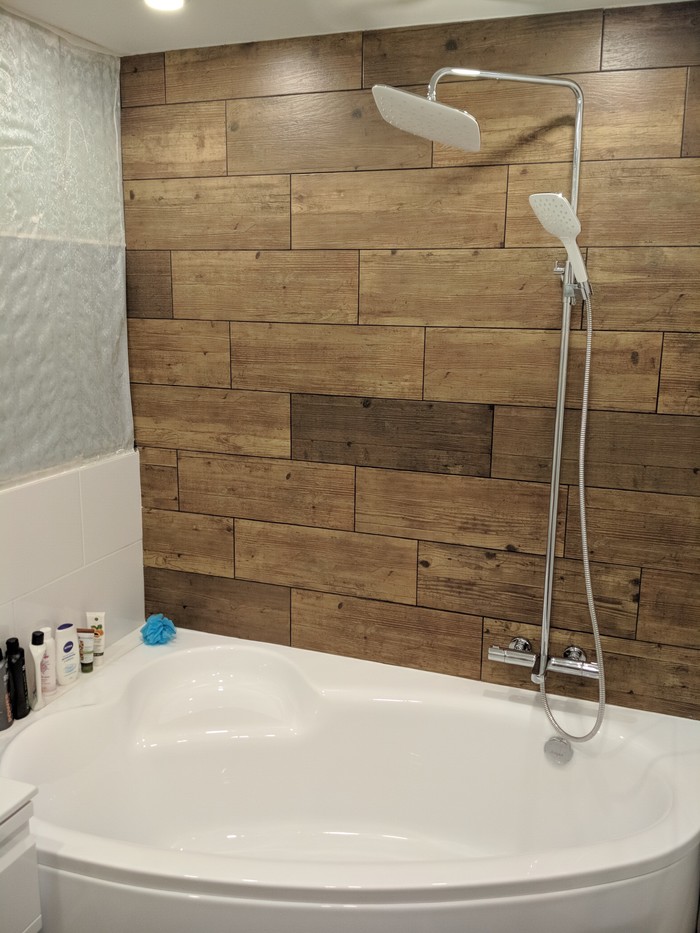
And, of course, we immediately bought the shower set.

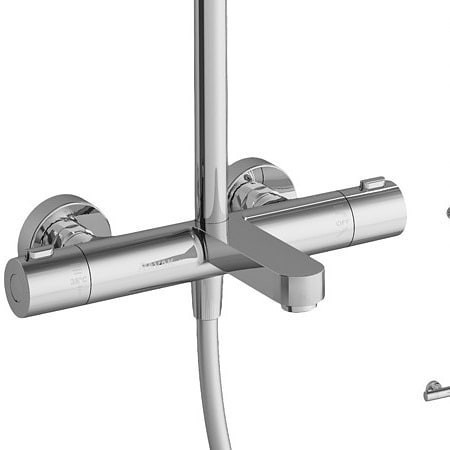
It’s a shower and bath set 👌Ravak Termo TE 092 00.
- Shower rail with Termo 300 overhead shower.
- Hand shower.
- Thermostatic mixer (with a bath spout) – distance from the wall (including the escutcheons to the spout) 22 cm.
The white color fits perfectly into our white interior 🤗 It’s a new model, and it’s kinetic 🙂 Everything moves easily: the rail is easily adjustable in height, the overhead shower can be rotated and angled as needed. The hand shower is adjusted with a lever near the handle: you press it and the height lock changes. And not just the height, but also the angle (the water can either hit your face or flow perpendicular to the floor).
⠀
And, of course, our dream – his majesty the thermostat 😍 After our trip to Bukovel, we appreciated its presence even more: you turn it on, and the water is immediately at a comfortable 38°C. It has a child safety lock (you can make the water cooler, but not hotter. To do this, you need to hold down the button 👌).
⠀
The temperature is controlled on the left, and the water flow is on the right. The diverter switches between shower/bath/overhead shower + flow rate control 😉
Our requirements limited our choice to just two models (actually, just this one). It was important for us to have a thermostat with a spout, so we wouldn’t have to install a separate one lower down (who even does that?). And this one has the longest spout. And there are only two models with spouts coming out of the thermostat 🙈
And a little later, we bought a water heater. It’s already installed.

In SMART mode, the heater uses the operating pattern it’s recorded over several days to heat the right amount of hot water exactly when you need it. It’s a godsend if you have a multi-tariff electricity meter 👌
⠀
Additional features:
- “Vacation” mode – maintains the water temperature at around 10°C.
- “Fast Heating” function provides accelerated water heating.
- “Operating Time Control” function allows you to set up to 3 different operating modes throughout the day.
There was one hiccup: when we were carrying it into the apartment, we noticed a dent. We had to wait about a week for a new one.
Specifications:
| Weight | 46 kg |
| Height | 1130 mm |
| Width | 500 mm |
| Depth | 512 mm |
| Electronics warranty | 2 years |
| Tank warranty | 10 years |
| Country of origin | Serbia |
| Protection class | IP24 |
| Temperature control | External (on the body) |
| Control type | Electronic |
| Maximum water pressure | 9 bar |
| Connection type | Bottom |
| Mounting | Wall-mounted |
| Installation | Vertical only |
| Voltage | 220 V |
| Max. heating temperature | 75 ºC |
| Heating element power | 1000/1000 W |
| Heating element type | Closed (“dry,” separated from water by a sealed tube) |
| Number of heating elements | Two independent |
| Inner tank material | Enameled steel |
| Outer casing material | Painted metal |
| Casing shape | Rectangular |
| Water heater type | Electric |
| Water heater subtype | Storage |
| Capacity | 118.1 l |
Finishing Touches Before the Final Stage
Continuing to prepare for the final stage of the renovation.
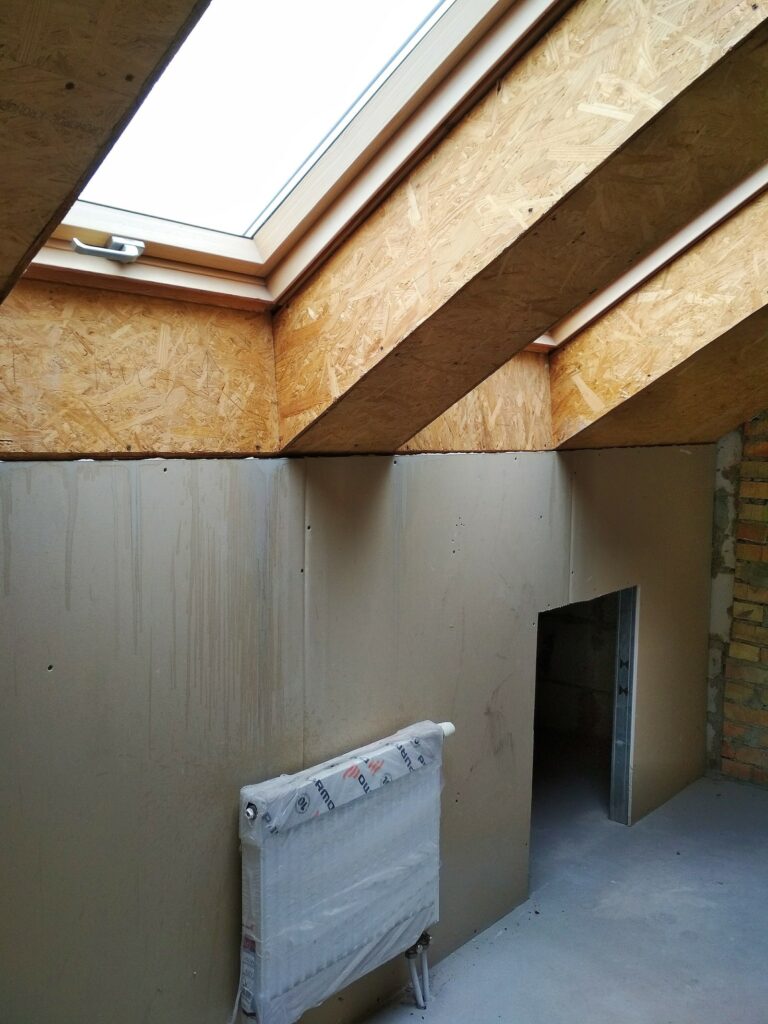
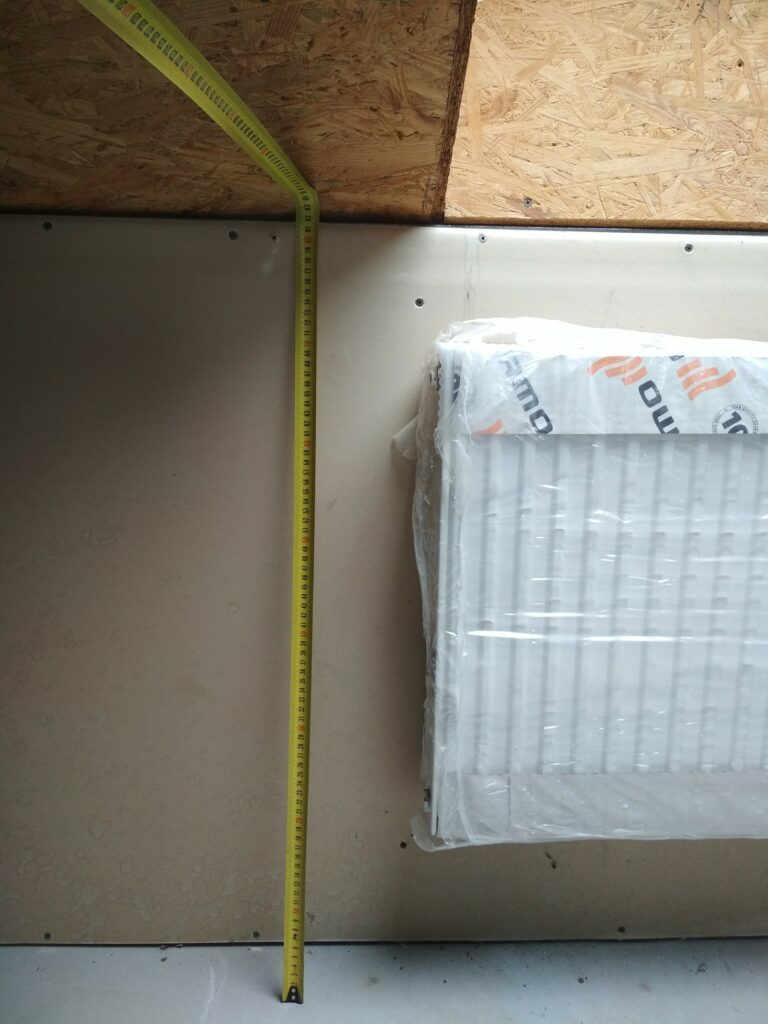
We replaced the radiators (and removed them from the kitchen and bathroom) and changed the way they’re connected. Previously, the pipes came from the floor, now they come from the wall (it’s more convenient for cleaning).

The living room is now covered with drywall. Currently, we’re sealing the joints.
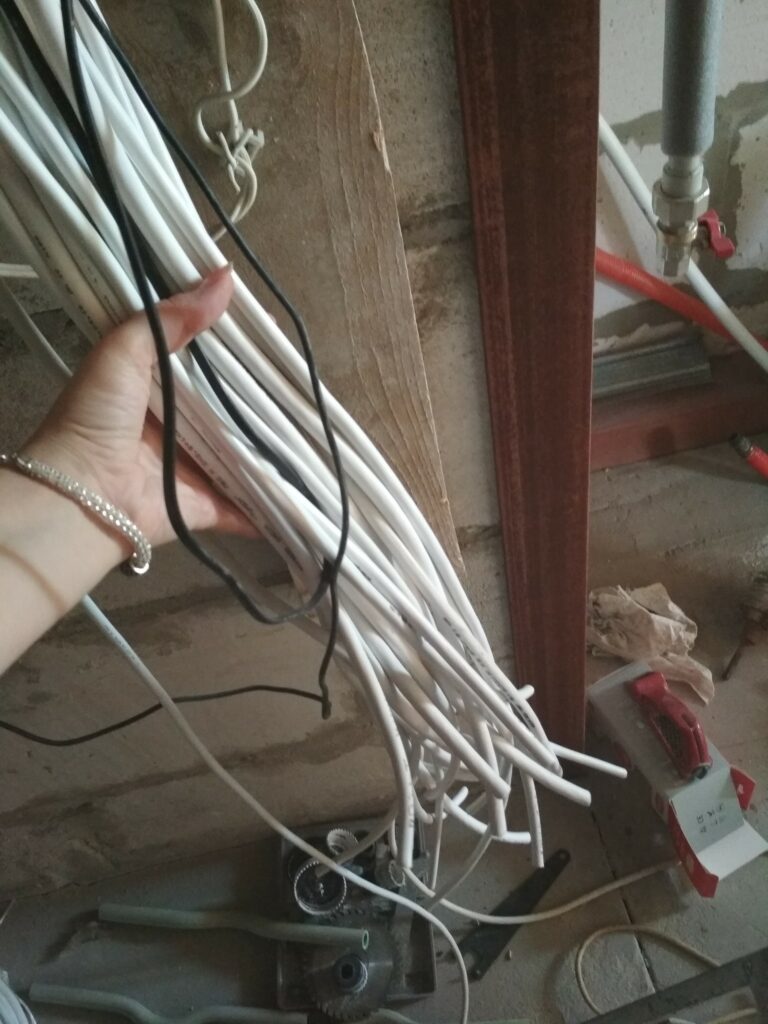
The bunch of wires is for the air conditioner. The wire above it is for the lighting.

We installed the lighting in the kitchen (or rather, we marked the wire outlet points). This is what the space above a small section of the flat ceiling looks like (1.35 meters wide – specifically for the extractor hood).
And a small shock. We bought the outlets a long time ago (during the planning stage) – they look like this.
Back then, we bought 45 outlets, switches, three-way switches, and frames. Today we counted the number of outlets in the apartment. It’s 79. 79 outlets! We need to buy another 34… And frames for them too. That’s practically one outlet per square meter 😂
We’ll take care of that tomorrow).
The heating season is underway, in case anyone’s interested. We’re currently heating the apartment to 35°C.

In 1.5 weeks (the meter reading was taken before December 1st), the meter clocked 350 kWh (of which 110 kWh were at the night tariff) at a temperature of 40°C. Not too shocking yet. We’re waiting for our first bill with the two tariffs.
We’re now on the home stretch before the final stage of the renovation 💪 The ceilings are done. We’re plastering the walls in the living room.
The photo below: the kitchen, now with a ceiling.
And the living room.
Don’t be scared by the wires. At first, I wanted a spider lamp, then track lights. Today I came in and announced that we’re going with the spider lamp after all. I was a bit late, but they pulled the wires out while I was there. Tomorrow, they’ll run them to the center of the room.
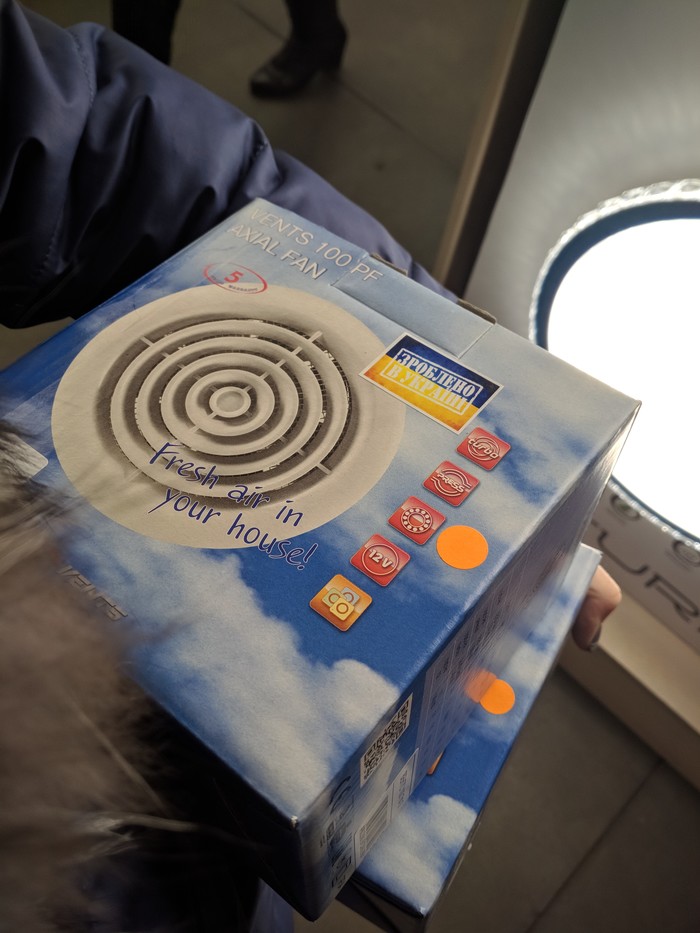
Today we bought extractor fans for the bathrooms:
We also stocked up on:
- Triora TR37 silk-matt paint.
- The missing outlets and frames.
- A bucket of adhesive for fiberglass mesh tape.
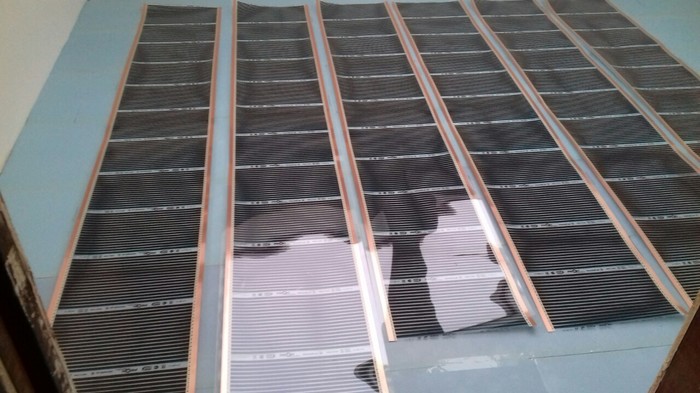
Heated Floor + Dark Room Tour
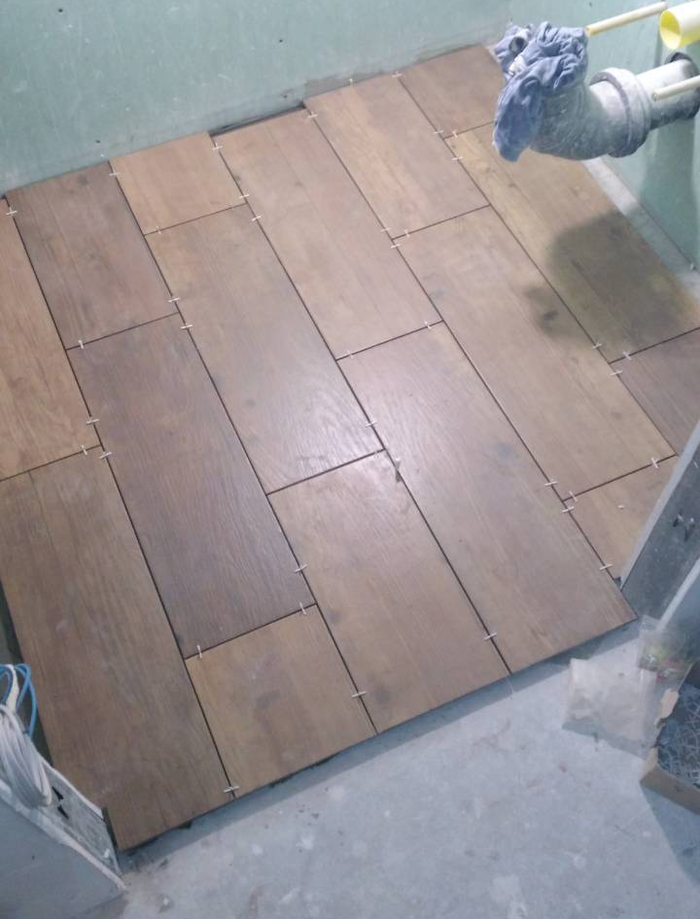
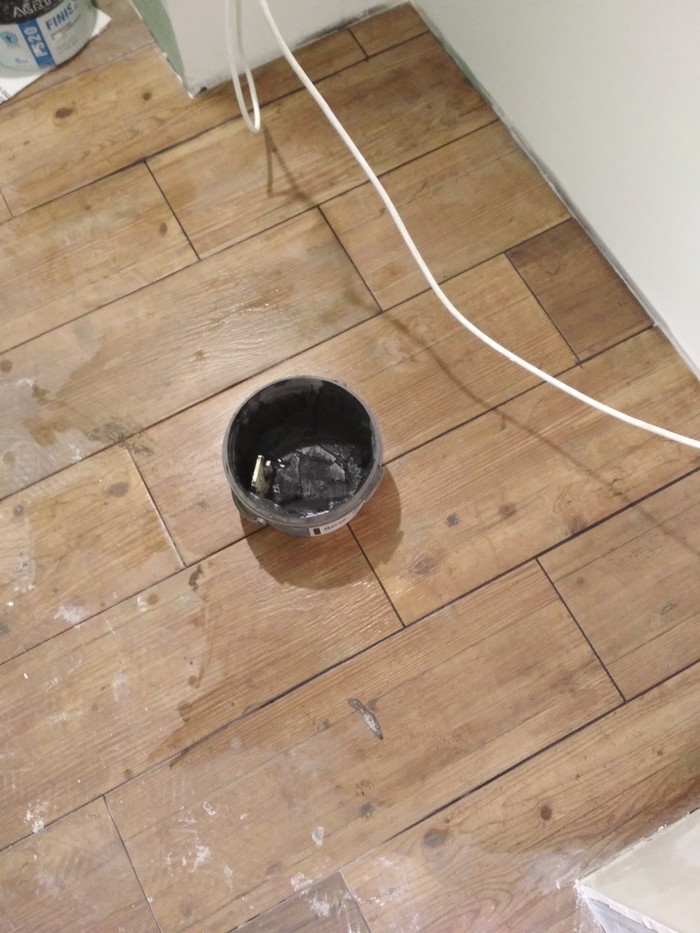
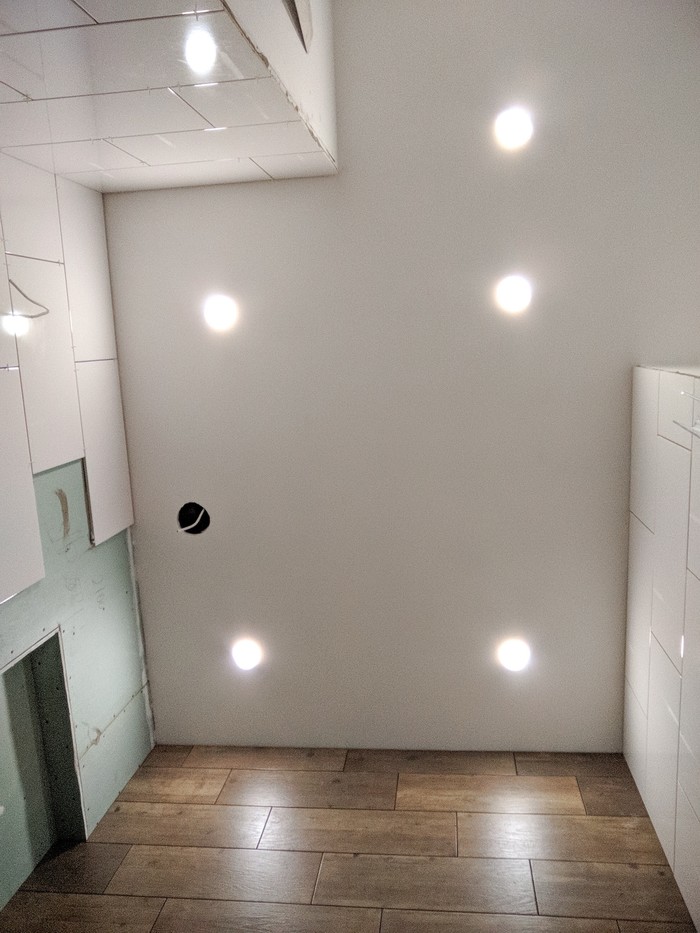
Did you notice we have tiles in the bathroom now? Laid with a 1/3 offset. The same direction as the laminate will be laid (to create a unified space). The joint will be covered with a narrow aluminum strip and should be in the middle of the doorway.
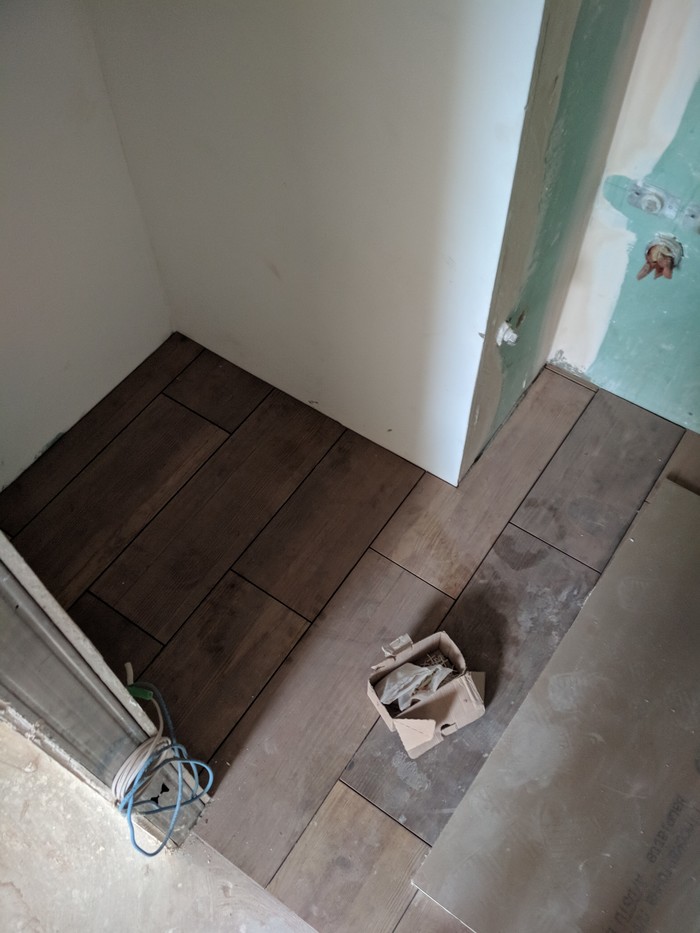
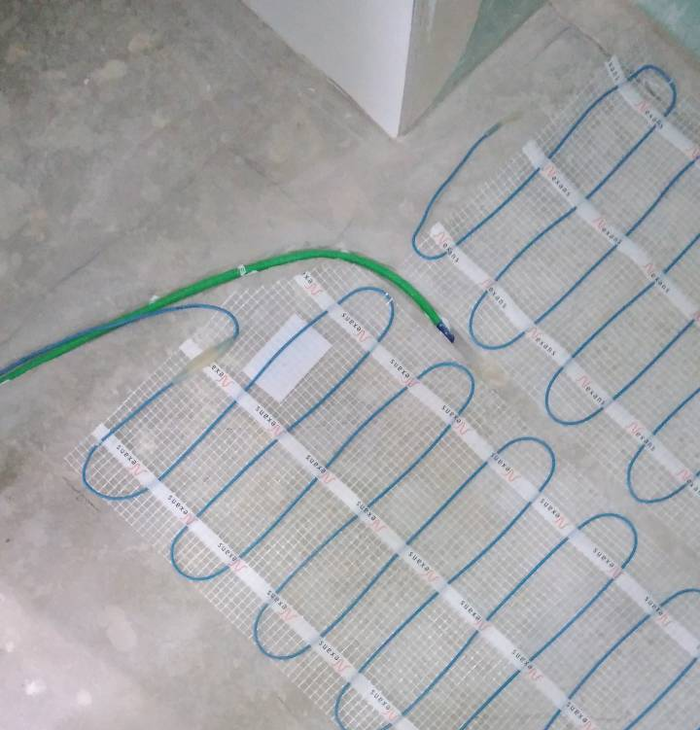
And we have a heated floor under the tiles 😎
I haven’t written about it yet.
So, we bought Nexans 1 sq. m. mats for the toilet and 1.5 sq. m. for the bathroom 🤗
Let me tell you more about the 1 sq. m. one.
- Nexans Millimat 137/150 W heating mat, 1 sq. m.
- Length: 2 m. Width: 0.5 m.
- Warranty: 240 months (you need to fill out a warranty card at the store, it must be stamped).
- Average service life: 60 years.
- Manufacturer: Norway.
- Over 100 years on the market, around 20 years in Ukraine.
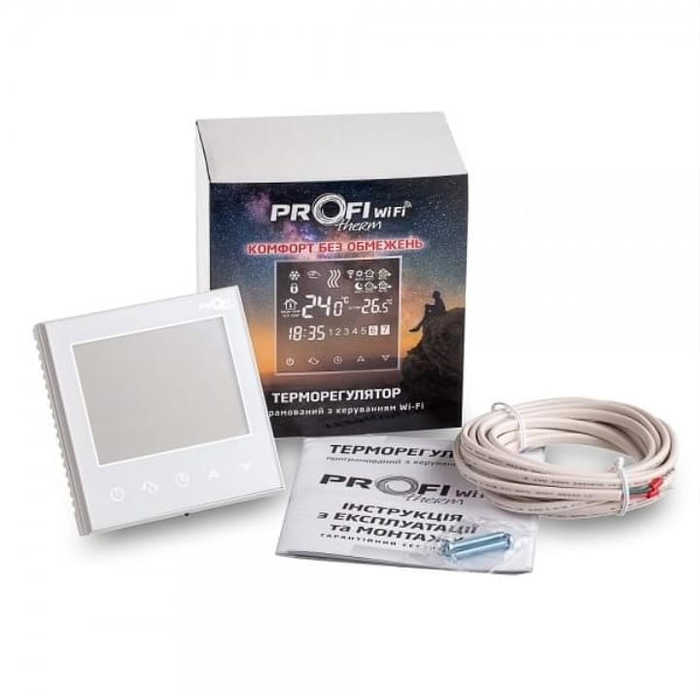
We also bought Profitherm WIFI Pearl White thermostats for them.
Electronic thermostat with a large LCD screen, convenient touch buttons, and Wi-Fi control 🙂
We chose these particular thermostats because:
✅ Stylish screen.
✅ Touch control (not a dial where it’s unclear what temperature you’ve set and what the current temperature is + it’s inconvenient to wipe + no child lock).
✅ Child lock (I saw someone’s toddler quietly sitting in a room and turning the thermostat dial… By the time they recorded the video, it was 42°C 😳).
✅ Wi-Fi control (via an app – I don’t know how it’ll be in real life, but it’s a plus that you don’t have to go to each room to adjust the temperature).
✅ Programs + vacation mode.
Moving In Soon?
1. Walls are puttied in the living room, bedroom, kitchen, and bathrooms.

Who predicted we’d get snowed in? It snowed. For two days straight. And that’s because we don’t have snow guards above our windows.

The living room and bedroom already have one coat of paint (Triora 37 silk-matt, white):
2. The toilet is practically finished.
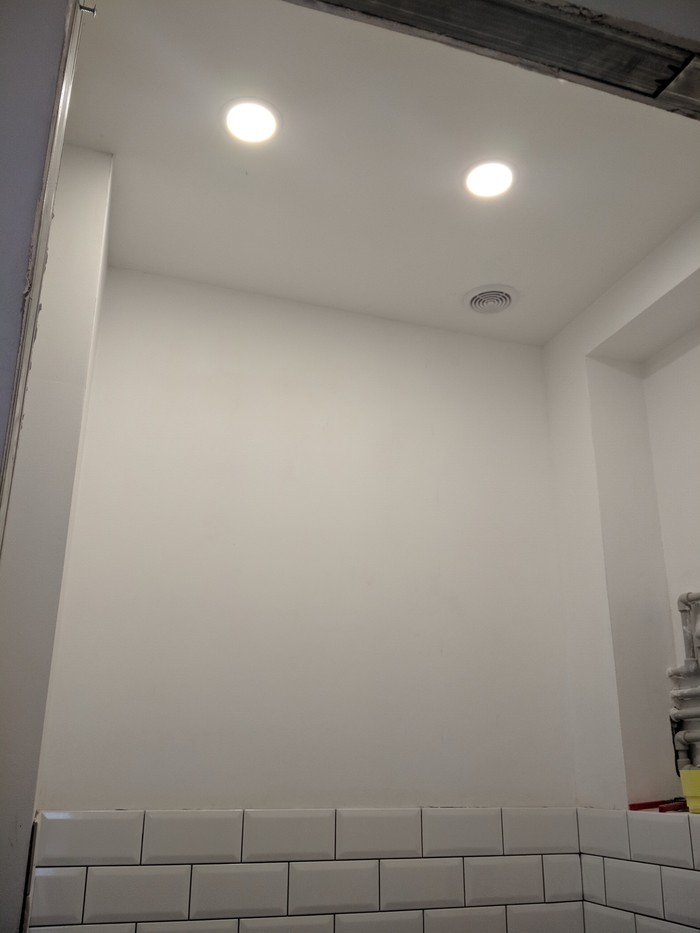
The tiles are laid, the toilet bowl is installed, the extractor fan and lights are connected.

Video tour of the bathroom:
3. The floor tiles are laid, including the heated floors.
This is the corner where the bathtub will be.
We’ve started grouting.

4. Our bathtub has arrived.
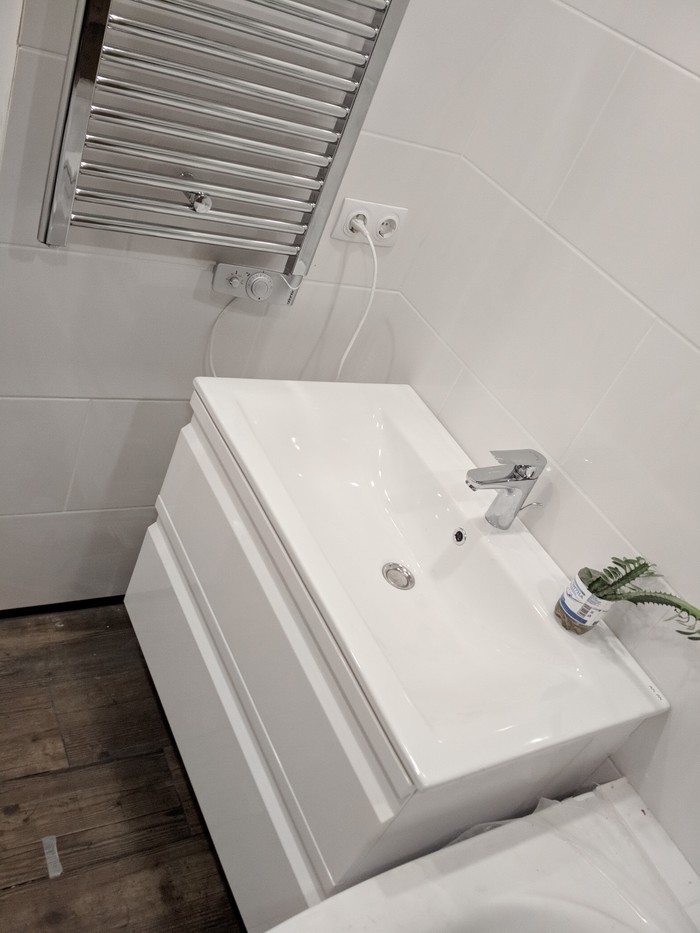
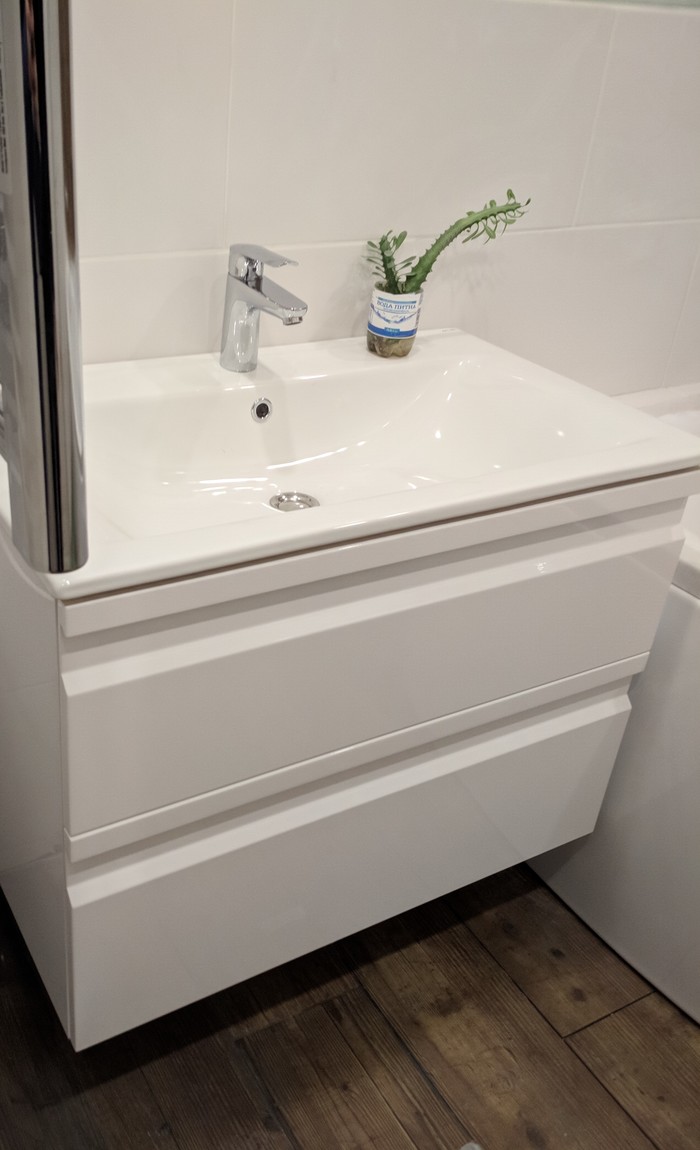
5. We bought a vanity unit with a sink and a faucet.
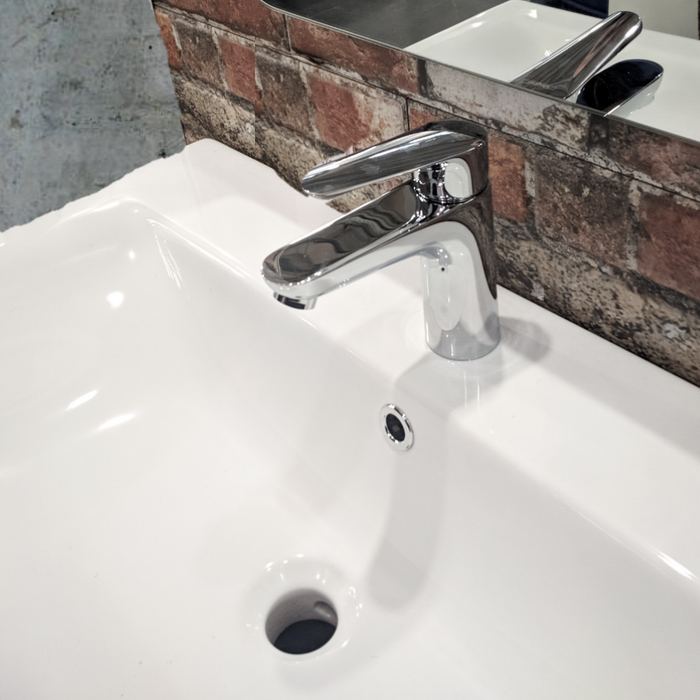
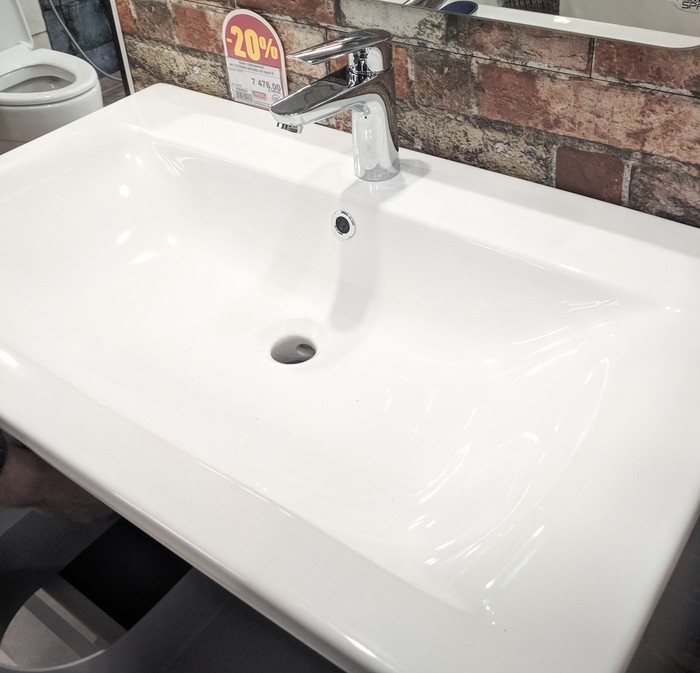
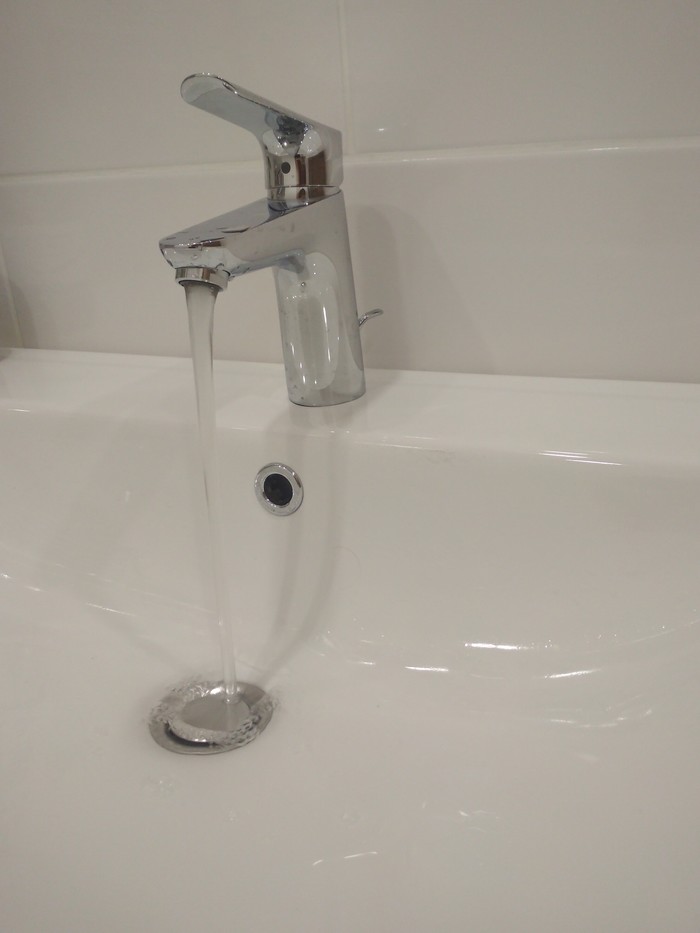
We tried out the faucet at the store. We bought the HANSGROHE Logis E 100 with a push-open waste set.
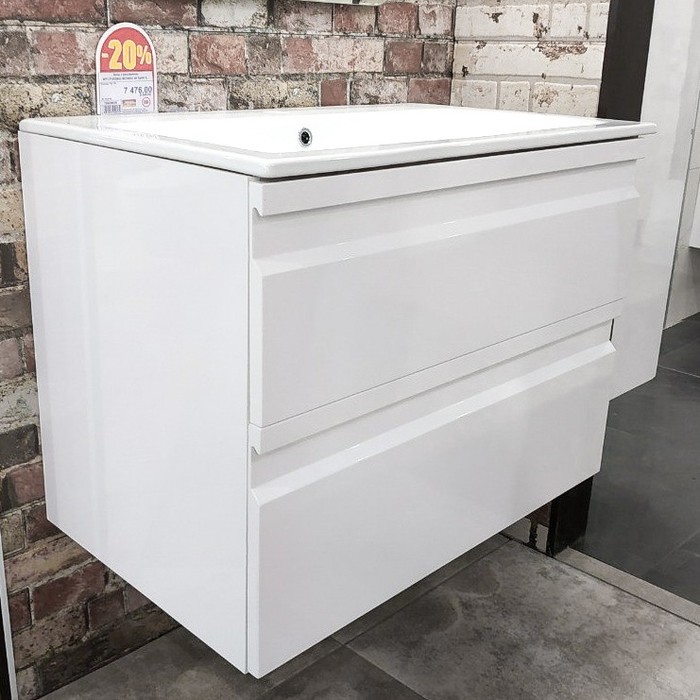
And an AM.PM Spirit S 80 wall-mounted vanity unit with a sink.
- Height: 46.2 cm.
- Width: 82 cm.
- Depth: 46.8 cm.

Moving In with Unfinished Business
Let’s start with the bathroom.
The walls are almost done. We’re missing 2 boxes of white tiles, and the niche is not finished yet.

We installed the bathtub. There’s a small shelf near the wider end – it will hold jars with bath salts, bath bombs, candles, and decorations. You can see the unfinished niche above it.
We installed the shower set. The overhead shower is not at its maximum height.
We installed the lights and the extractor fan (but it’s not in the photo yet).
We installed the vanity unit with the sink and the towel warmer:
I shot this video in Epicenter. It’s made by Atlantic, 144*48 cm. It has several operating modes:
There will be a mirror with lighting above the sink.

We installed the bathtub panel. We tested the thermostatic mixer – it works.
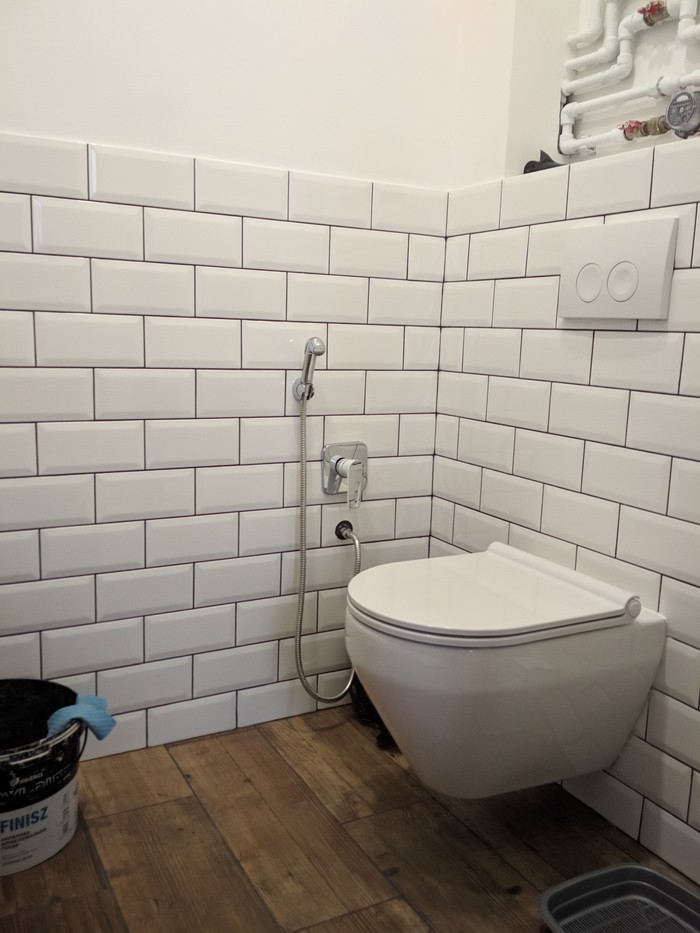
The toilet.
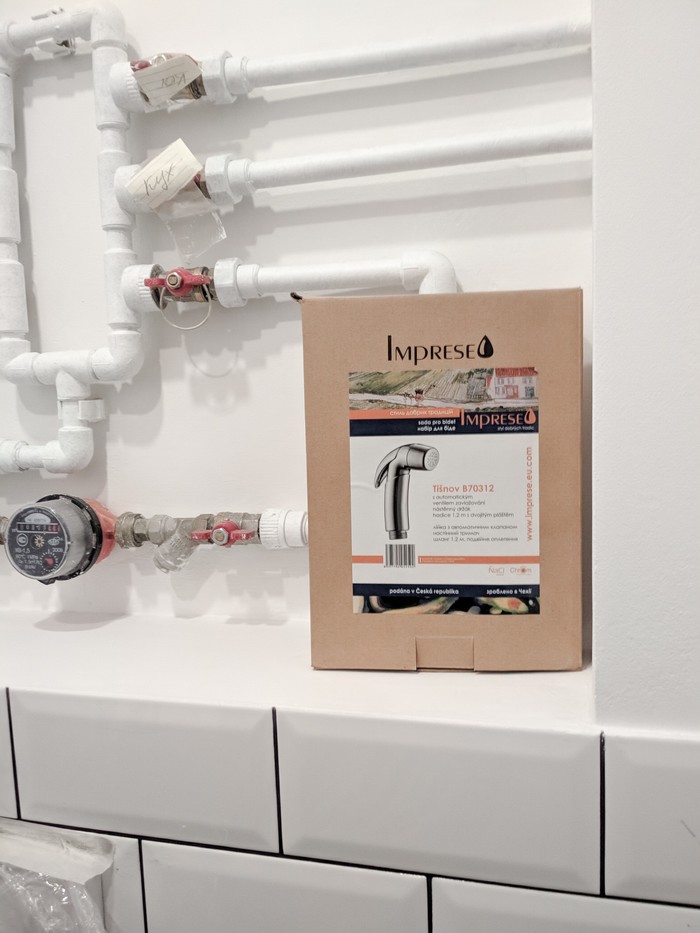
We bought and installed a hand bidet sprayer. There will be photos of it installed later in the article.
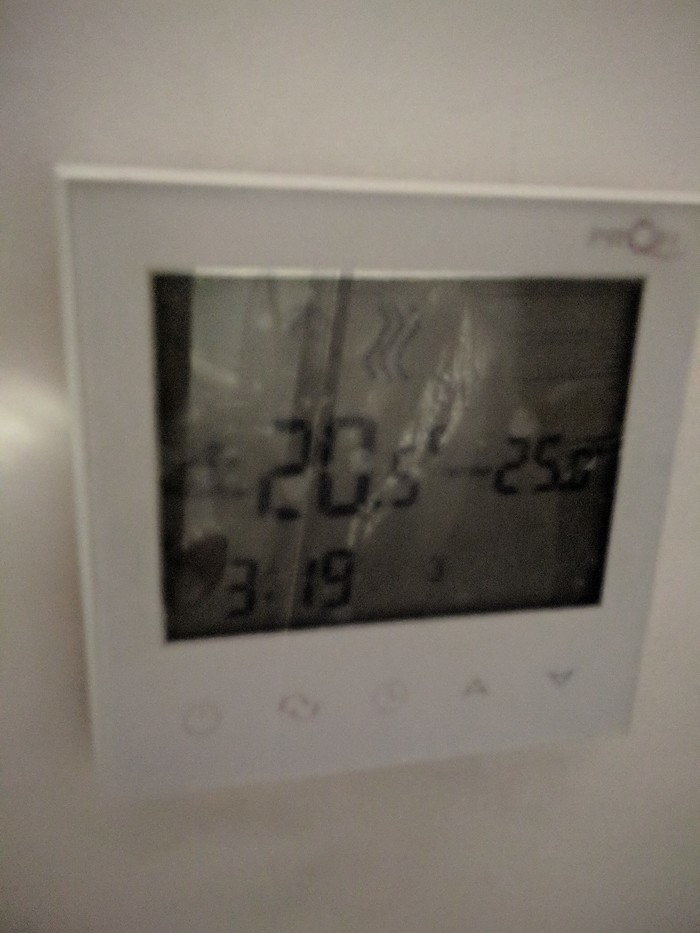
The heated floor in the bathrooms is working. I tried to take a photo of the thermostat.
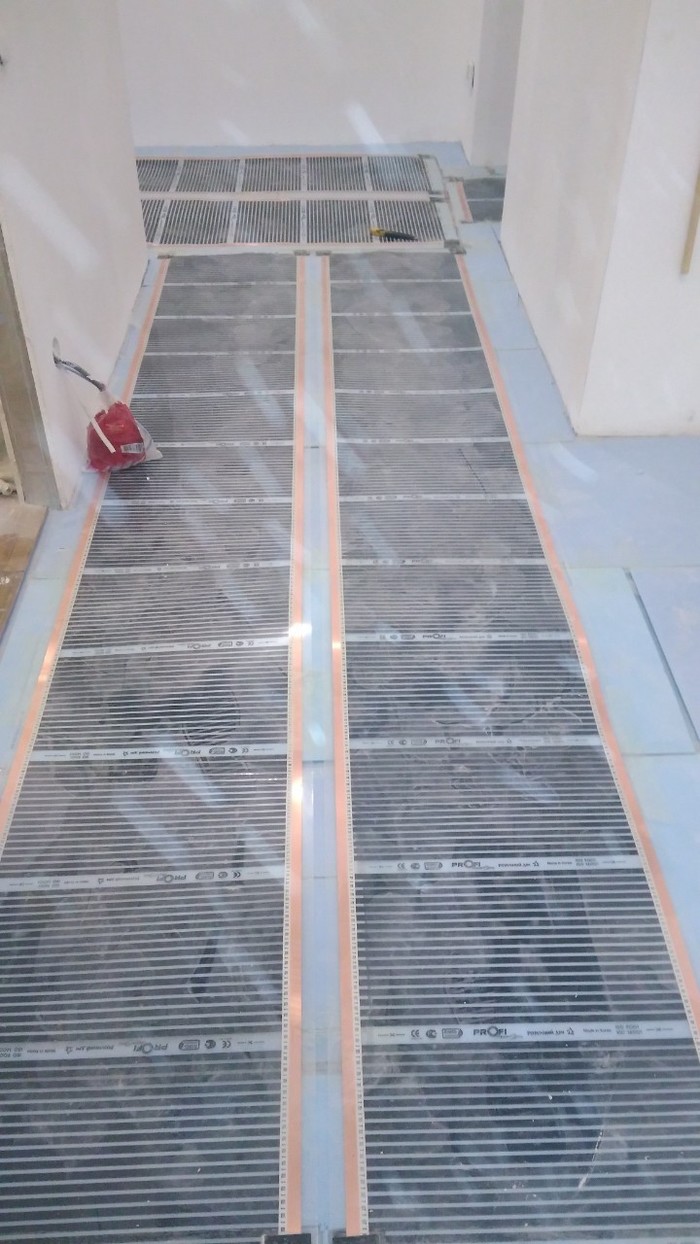
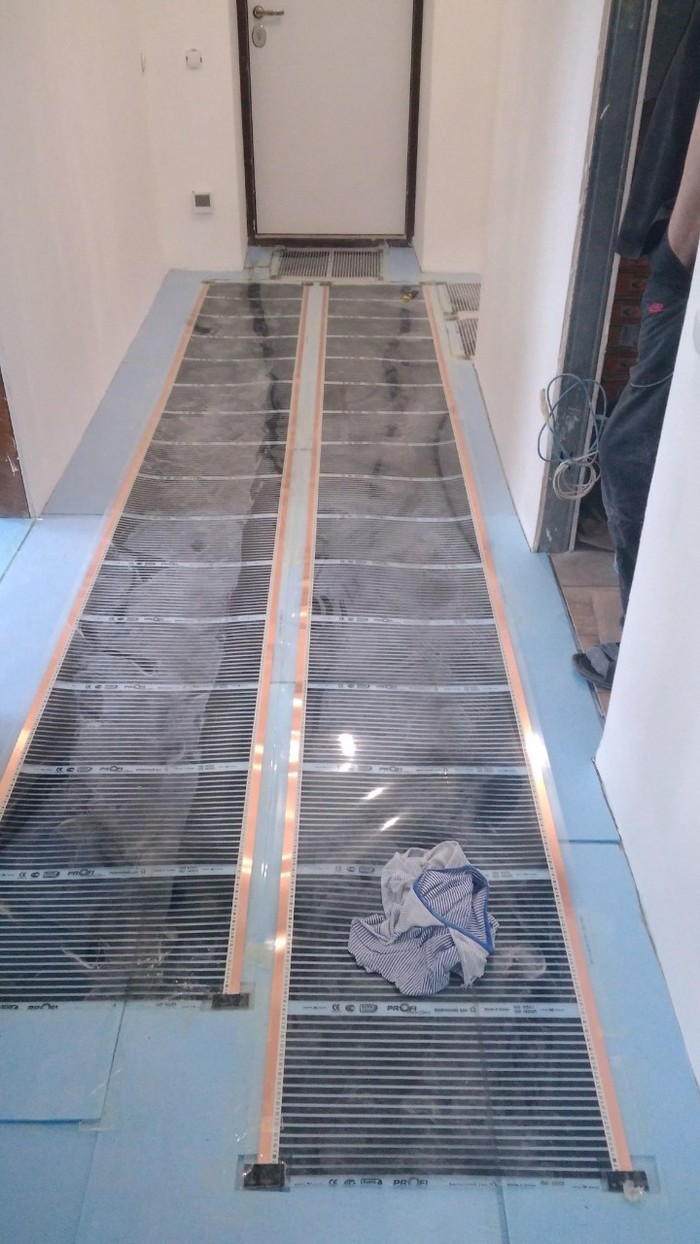
We’ve started laying the heated floor in the kitchen and hallway.
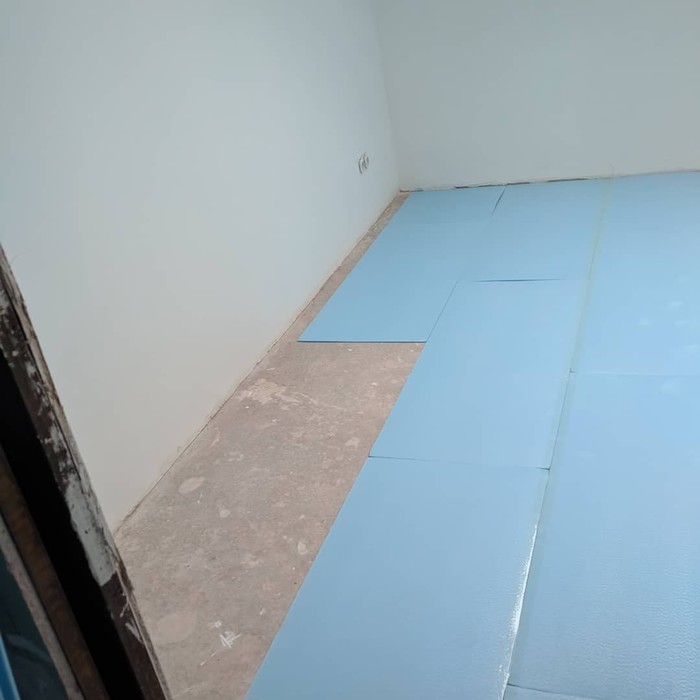
We used 9 sq. m. in the kitchen.
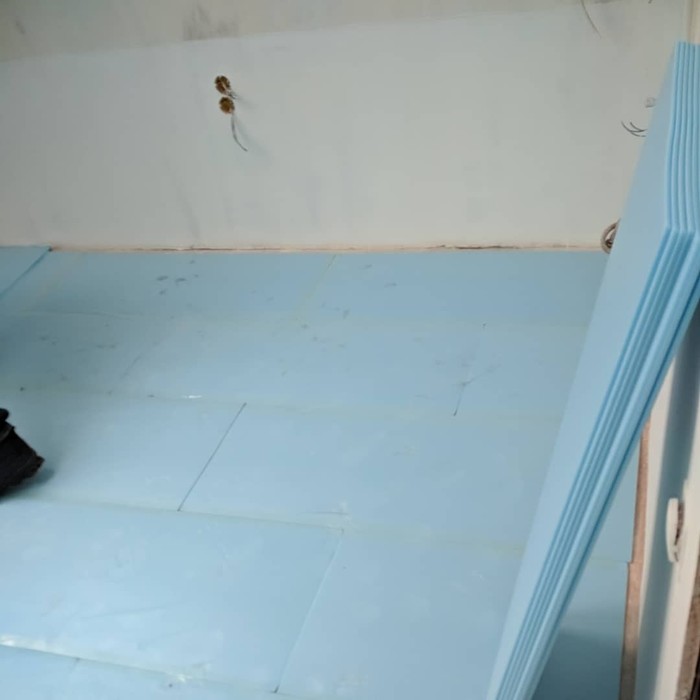
The hallway from the nursery side (7 sq. m. of heated floor).
The hallway from the living room side.
Vapor-permeable membrane on the heated floor and the thermostats are installed.

We started laying the laminate flooring with a 1/4 offset:

Then I said we’re doing a 1/3 offset:


We still need to apply another coat of paint to the walls, finish laying the laminate in the nursery, and install the bathroom doors.
We’ve Moved In!
So, drumroll…
We’ve moved in!

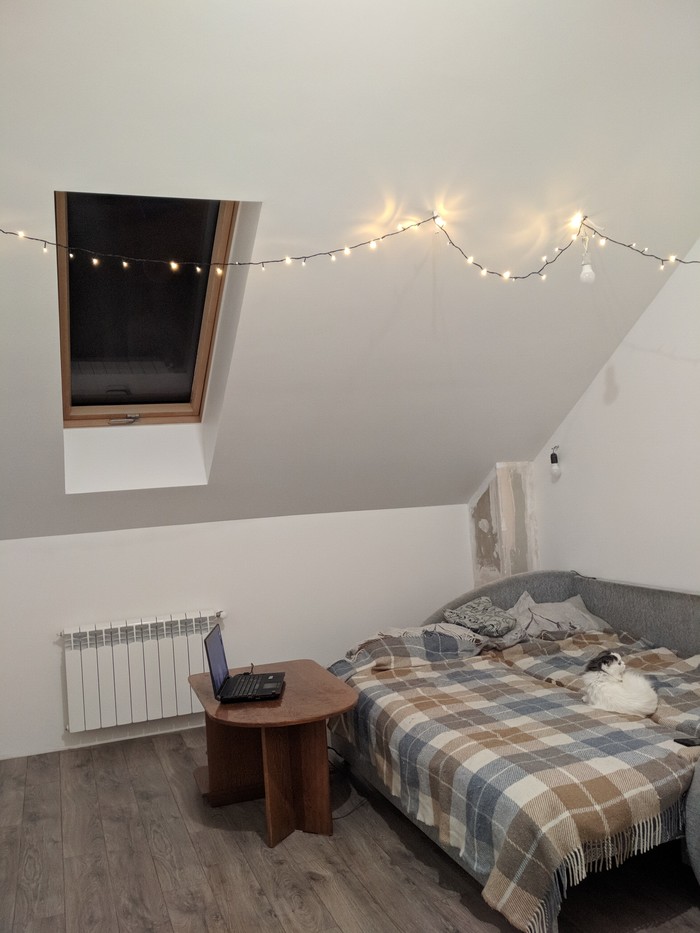
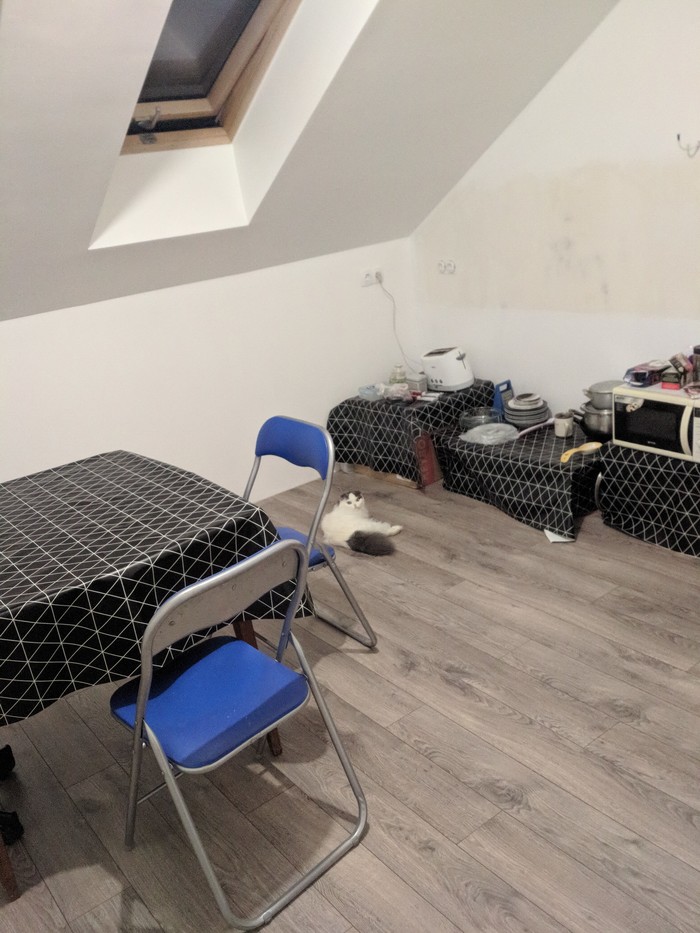
We don’t have a lot of belongings, and even fewer pieces of furniture. We only bought a dresser. We already had a sofa, we brought a bookcase (painted it white), a table for the kitchen (instead of a proper kitchen, we have large containers for food and an old sink built into the table), a coffee table, and 2 chairs. I made a second table near the sofa out of a box and a photo backdrop. As for appliances, we brought a refrigerator, a washing machine, a microwave, an electric stovetop (borrowed from a friend), a toaster, and a laptop. Not bad for starters, we already spent a night here and are settling in. I even hung up a string of fairy lights.
I don’t think photos with boxes and bags are that interesting, but this is the general view for now.
The bedroom:
The kitchen:
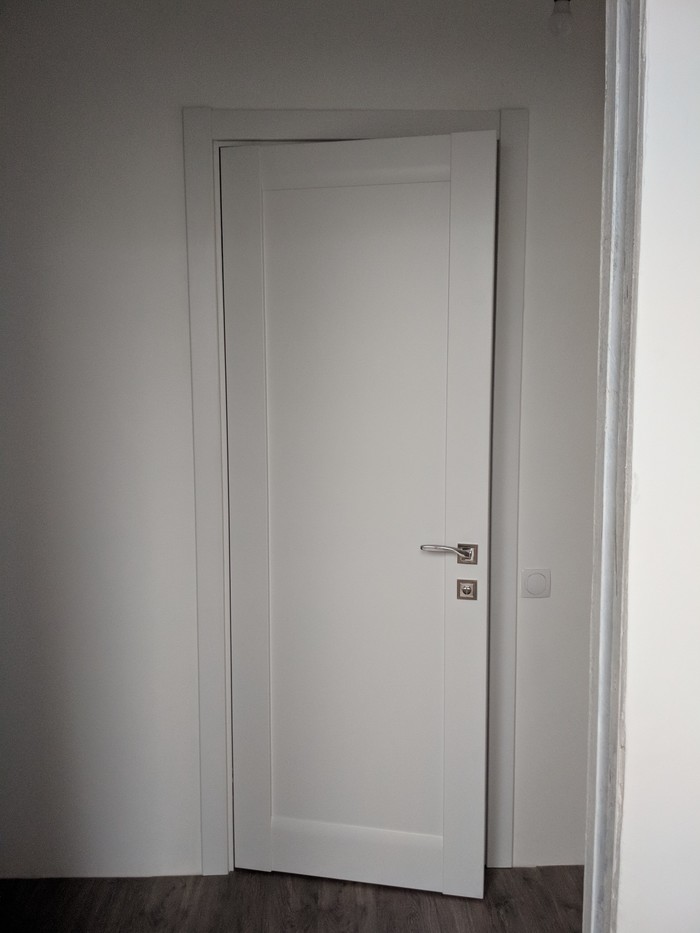
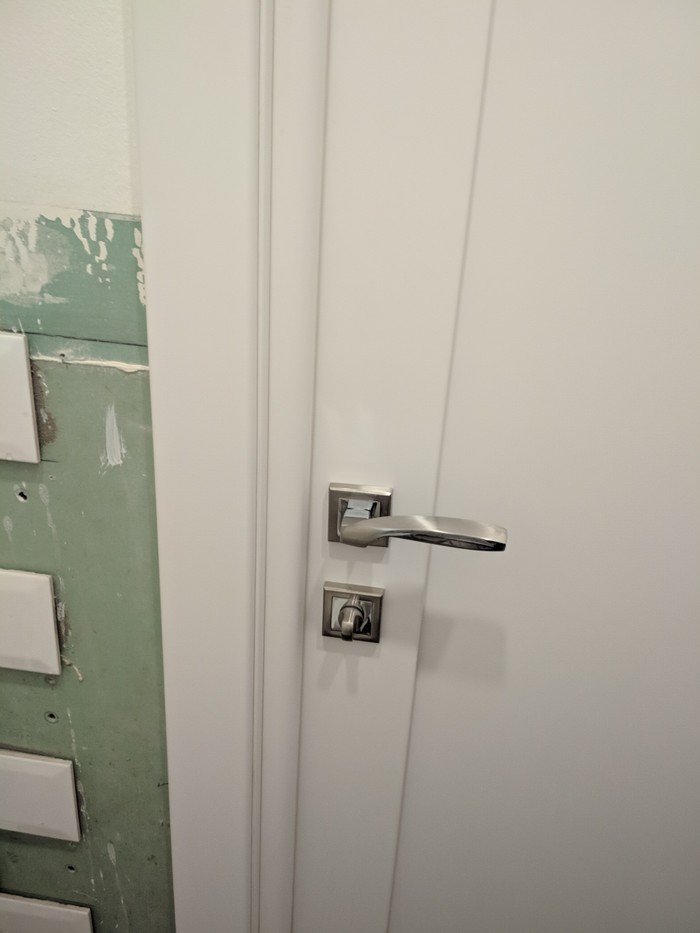
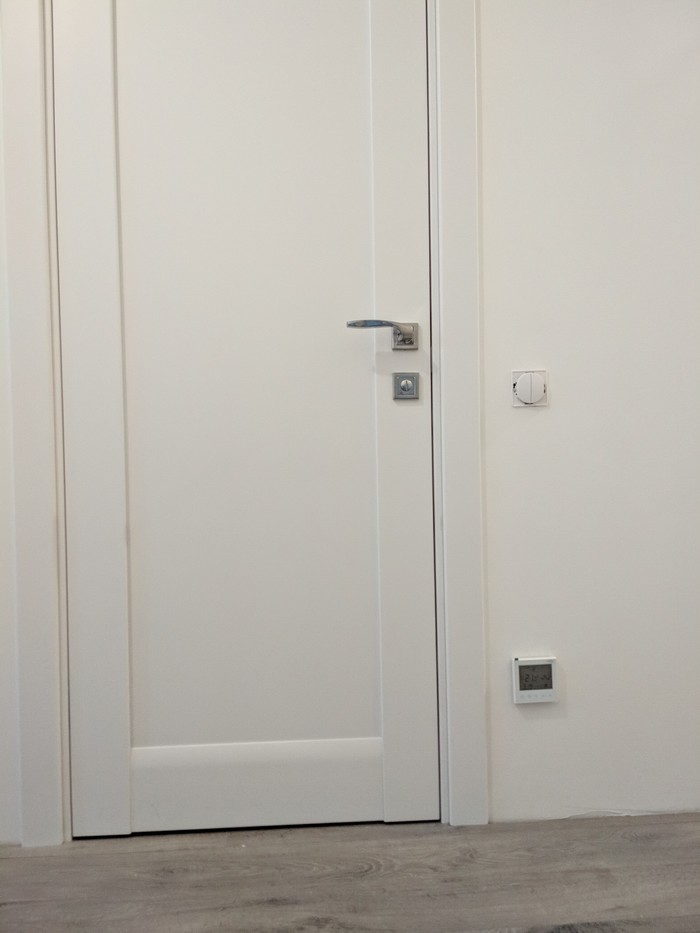
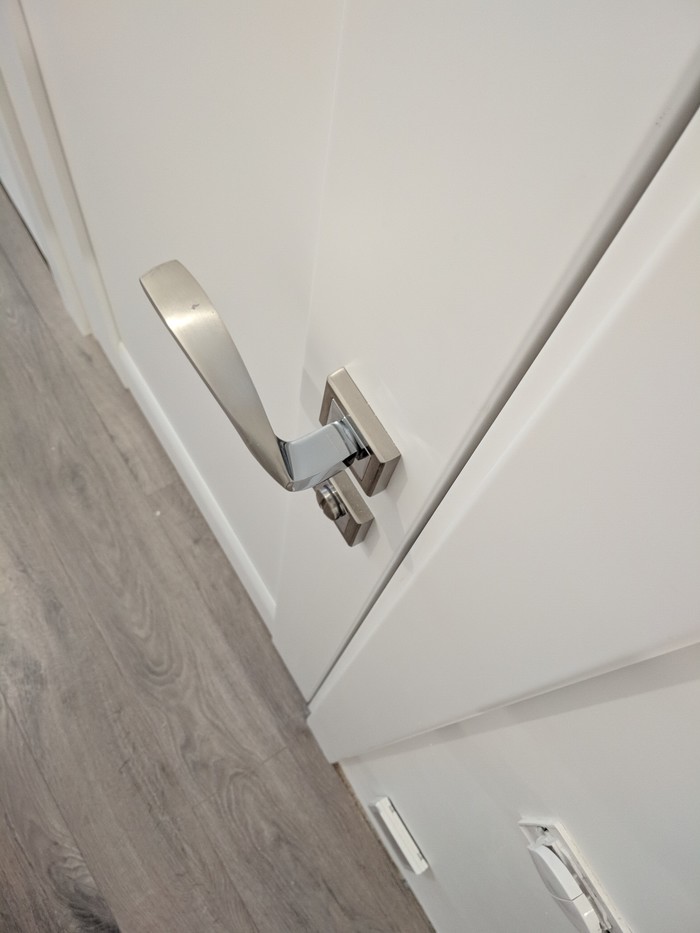
The toilet door (we installed doors in the bathrooms so we could have guests over).
The toilet itself (I fully appreciated the heated floor this morning, but the cat still prefers hanging out on the sofa):
The hallway (view of the nursery and bathroom):
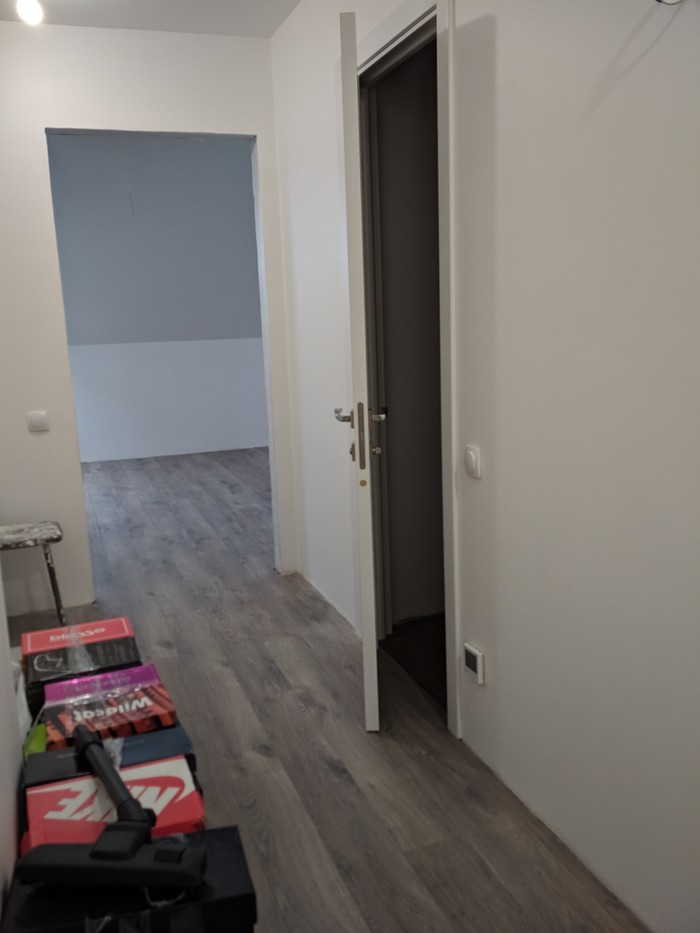
The bathroom door is the same:
The bathroom.
I arranged my bottles and jars. We took a shower under the overhead shower yesterday, and there’s enough room for two. By the way, the thermostatic mixer is awesome. No need to adjust the temperature, 38°C is very comfortable. And stepping barefoot on the warm tiles is priceless.
Answering the question about our sink: there’s no splashing even at maximum water pressure; no, the water doesn’t run down my hands, it all goes into the sink when I wash my face (or maybe I’m washing my face wrong).
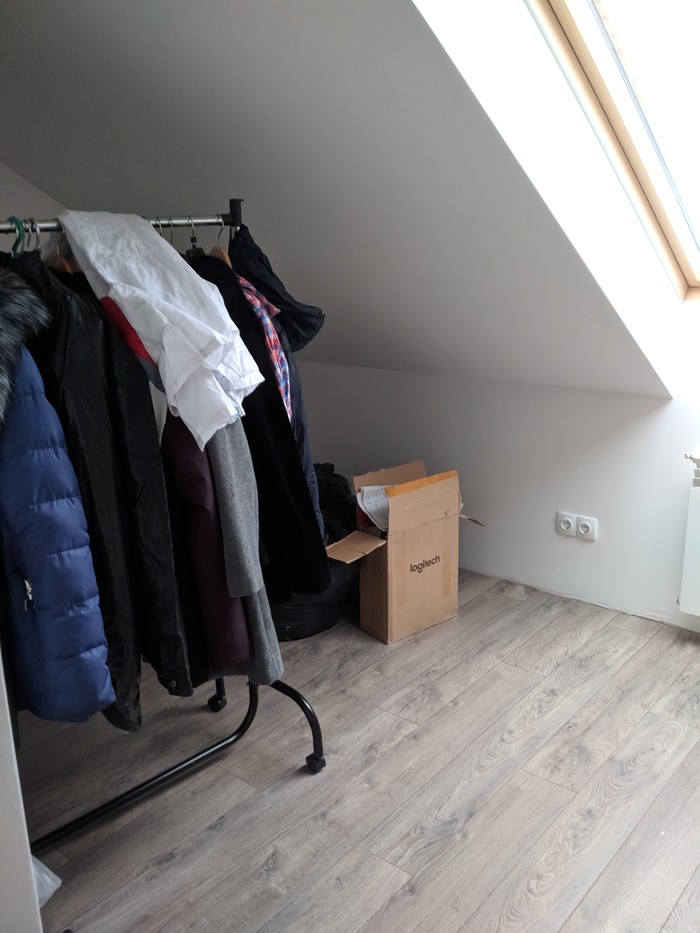
The nursery is empty. We’re storing the doors in there.
You were asking for a cost breakdown. Since the renovation is not finished yet and many things are missing (the niche in the bathroom, baseboards, the brick wall, lighting, a proper kitchen, a sink in the toilet, mirrors, and it wouldn’t hurt to get some wardrobes, a proper hallway setup, and a bed), I don’t think it’s worth going into too much detail.
So far, we’ve spent $13,500. This includes materials, delivery, taxis, consumables, plumbing fixtures, electrical work, the water heater, heated floors and thermostats, radiators, 1 window, 5 interior doors, and the front door.